WebEngine Recipe Browser
A small hybrid application based on the WebEngineView QML type and Qt Quick Controls 2.
Recipe Browser demonstrates how to use the WebEngineView item, Qt Quick items, and Qt Quick Controls 2 items to develop a small hybrid web browser application. A ListView-based item is used to display a list of recipe names. Clicking on a name causes the web view to load the respective recipe page. The overall appearance of the application is provided by the Qt Quick Controls 2 items, which have their active style set to the Material style. The web content is a mix of HTML and Markdown source compiled to HTML, along with CSS and JavaScript.
Running the Example
To run the example from Qt Creator, open the Welcome mode and select the example from Examples. For more information, visit Building and Running an Example.
C++ Code
In main.cpp, we use the QGuiApplication and QQmlApplicationEngine classes to set up and load the main QML file. We call QtWebEngine::initialize so we can use WebEngineView in our QML code. We enable high DPI screen support by setting the Qt::AA_EnableHighDpiScaling attribute. We set the default Qt Quick Controls 2 style to the Material style, so we do not have to specify it for each new item we add. Finally, we use a C++ define to check whether the application is compiled for an embedded platform. The value will be used in the main QML code to determine the window size.
 #include <QGuiApplication>
 #include <QQmlApplicationEngine>
 #include <QQmlContext>
 #include <QQuickStyle>
 #include <qtwebengineglobal.h>

 int main(int argc, char *argv[])
 {
     QCoreApplication::setOrganizationName("QtExamples");
     QCoreApplication::setAttribute(Qt::AA_EnableHighDpiScaling);
     QtWebEngine::initialize();

     QGuiApplication app(argc, argv);

     QQuickStyle::setStyle(QStringLiteral("Material"));

     QQmlApplicationEngine engine;

     bool isEmbedded = false;
 #ifdef QTWEBENGINE_RECIPE_BROWSER_EMBEDDED
     isEmbedded = true;
 #endif
     engine.rootContext()->setContextProperty(QStringLiteral("isEmbedded"), isEmbedded);

     engine.load(QUrl(QStringLiteral("qrc:/qml/main.qml")));

     return app.exec();
 }
QML Code
In the main.qml file, we first create a top-level window and set a title for it. We also set up the size of the window depending on its primary orientation as well as the platform, so that the application is usable on both desktop and embedded platforms. On desktop, the size is constrained by a minimum of 320x480 pixels up to the maximum size that the screen supports. The default window size is 1024 pixels wide and 768 pixels high in landscape orientation. On embedded devices, the window will occupy the whole screen.
 ApplicationWindow {
     id: appWindow
     title: qsTr("Recipe Browser")
     visible: true

     property int shorterDesktop: 768
     property int longerDesktop: 1024
     property int shorterMin: 360
     property int longerMin: 480
     property bool isPortrait: Screen.primaryOrientation === Qt.PortraitOrientation
     width: {
         if (isEmbedded)
             return Screen.width
         var potentialWidth = shorterDesktop
         if (!isPortrait)
             potentialWidth = longerDesktop
         return potentialWidth > Screen.width ? Screen.width : potentialWidth
     }
     height: {
         if (isEmbedded)
             return Screen.height
         var potentialHeight = longerDesktop
         if (!isPortrait)
             potentialHeight = shorterDesktop
         return potentialHeight > Screen.height ? Screen.height : potentialHeight
     }
     minimumWidth: isPortrait ? shorterMin : longerMin
     minimumHeight: isPortrait ? longerMin : shorterMin
Next, we add a RowLayout item so we can divide the window into two parts: one being a custom RecipeList item containing the recipe titles, and the other being the WebEngineView, which shows the recipe details. The spacing is set to zero so the items are positioned directly next to each other.
     RowLayout {
         id: container
         anchors.fill: parent
         spacing: 0

         RecipeList {
                 ...
             }
         }

         WebEngineView {
                 ...
         }
     }
The RecipeList item has a few attached Layout properties, in order to scale the item to a maximum of one third of the layout width. We give the item focus, so that the keyboard can be used to navigate the recipes, in addition to using mouse and touch. We also add a handler for the custom recipeSelected signal, to tell the WebEngineView to load the URL of the selected recipe.
         RecipeList {
             id: recipeList
             Layout.minimumWidth: 124
             Layout.preferredWidth: parent.width / 3
             Layout.maximumWidth: 300
             Layout.fillWidth: true
             Layout.fillHeight: true
             focus: true
             activeFocusOnTab: true
             onRecipeSelected: function(url) {
                 webView.showRecipe(url)
             }
The WebEngineView has similar layout properties, to make it occupy two thirds of the layout width.
         WebEngineView {
             id: webView
             Layout.preferredWidth: 2 * parent.width / 3
             Layout.fillWidth: true
             Layout.fillHeight: true
We then disable the focusOnNavigationEnabled setting to make sure that the WebEngineView does not steal focus from the RecipeList item every time its URL is changed. This allows the user to continue navigating through the recipes using the keyboard. We also disable the default context menu by accepting the ContextMenuRequest.
             settings.focusOnNavigationEnabled: false

             onContextMenuRequested: function(request) {
                 request.accepted = true
             }
When the application starts, instead of directly showing the WebEngineView, we show a placeholder Rectangle with a BusyIndicator to provide a nicer user experience while the application is loading.
             property bool firstLoadComplete: false
             onLoadingChanged: function(loadRequest) {
                 if (loadRequest.status === WebEngineView.LoadSucceededStatus
                     && !firstLoadComplete) {
                     // Debounce the showing of the web content, so images are more likely
                     // to have loaded completely.
                     showTimer.start()
                 }
             ...
             Rectangle {
                 id: webViewPlaceholder
                 anchors.fill: parent
                 z: 1
                 color: "white"

                 BusyIndicator {
                     id: busy
                     anchors.centerIn: parent
                 }
Once the first page in the view is loaded, we start a Timer that will hide the placeholder and show the actual page. The delay provides more time for the recipe images to load, so that when the view is shown, the page is completely rendered. The timer also shows a help ToolTip that informs the user on how to navigate the recipes.
             Timer {
                 id: showTimer
                 interval: 500
                 repeat: false
                 onTriggered: {
                     webView.show(true)
                     webView.firstLoadComplete = true
                     recipeList.showHelp()
                 }
Let's see what the RecipeList item looks like from the inside. The root item is a FocusScope to allow transferring focus to the child ListView whenever the root item receives focus. We also declare a custom recipeSelected signal, which will be emitted when the current item of the ListView changes.
 FocusScope {
     id: root
     signal recipeSelected(url url)
A ColumnLayout holds a header Label above the ListView, and the ListView itself. Again, we set the spacing to zero and make sure the layout occupies the whole space of the parent item.
     ColumnLayout {
         spacing: 0
         anchors.fill: parent
Inside the layout there is a styled ToolBar item, with a Label inside of it serving as the ListView header.
         ToolBar {
             id: headerBackground
             Layout.fillWidth: true
             implicitHeight: headerText.height + 20

             Label {
                 id: headerText
                 width: parent.width
                 text: qsTr("Favorite recipes")
                 padding: 10
                 anchors.centerIn: parent
             }
         }
The second item inside the layout is a ListView, whose contents will fill the remaining space in the layout. We set clip to true, so that the delegates that are scrolled up are not seen under the ToolBar item. We set focus to true, so the ListView gains focus when the FocusScope does. We add a vertical scroll bar, so the user can scroll through the recipes if the window size is small. We also specify the recipe model to be used by the ListView as described later in this topic.
         ListView {
             id: listView
             Layout.fillWidth: true
             Layout.fillHeight: true
             keyNavigationWraps: true
             clip: true
             focus: true
             ScrollBar.vertical: ScrollBar { }

             model: recipeModel
We have an ItemDelegate set as the ListView delegate, which displays the recipe title. The contentItem is a Text item, customized with a few properties to adjust the visual appearance and position of the text. We create a binding to the current delegate's model URL, so we can access the respective URL outside the delegate itself. We set the highlighted property to true whenever the item is the current one in the ListView to provide visual feedback. And we set the focus on the ListView whenever a delegate is clicked, so that keyboard navigation works in case the focus was previously in the WebEngineView.
             delegate: ItemDelegate {
                 width: parent.width
                 text: model.name
                 contentItem: Text {
                     text: parent.text
                     font: parent.font
                     color: parent.enabled ? parent.Material.primaryTextColor
                                           : parent.Material.hintTextColor
                     elide: Text.ElideRight
                     horizontalAlignment: Text.AlignLeft
                     verticalAlignment: Text.AlignVCenter
                     wrapMode: Text.Wrap
                 }

                 property url url: model.url
                 highlighted: ListView.isCurrentItem

                 onClicked: {
                     listView.forceActiveFocus()
                     listView.currentIndex = model.index
                 }
             }
A handler is defined for the currentItemChanged signal to emit our own recipeSelected signal with the URL that the WebEngineView should load.
             onCurrentItemChanged: {
                 root.recipeSelected(currentItem.url)
             }
We use a ListModel with seven ListElements, each of which contains a recipe title and the URL to an HTML page contained in a resource file. The model is used to populate the ListView with the recipes and to show the recipe details in the WebEngineView.
             ListModel {
                 id: recipeModel

                 ListElement {
                     name: "Pizza Diavola"
                     url: "qrc:///pages/pizza.html"
                 }
                 ListElement {
                     name: "Steak"
                     url: "qrc:///pages/steak.html"
                 }
                 ListElement {
                     name: "Burger"
                     url: "qrc:///pages/burger.html"
                 }
                 ListElement {
                     name: "Soup"
                     url: "qrc:///pages/soup.html"
                 }
                 ListElement {
                     name: "Pasta"
                     url: "qrc:///pages/pasta.html"
                 }
                 ListElement {
                     name: "Grilled Skewers"
                     url: "qrc:///pages/skewers.html"
                 }
                 ListElement {
                     name: "Cupcakes"
                     url: "qrc:///pages/cupcakes.html"
                 }
             }
We use a ToolTip item that is displayed on application startup to inform the users how they can navigate and view the details of each recipe. The ToolTip is shown using the showHelp method, which is invoked by the Timer in the main.qml file.
             ToolTip {
                 id: help
                 implicitWidth: root.width - padding * 3
                 y: root.y + root.height
                 delay: 1000
                 timeout: 5000
                 text: qsTr("Use keyboard, mouse, or touch controls to navigate through the\
                             recipes.")

                 contentItem: Text {
                     text: help.text
                     font: help.font
                     color: help.Material.primaryTextColor
                     wrapMode: Text.Wrap
                 }
             }
         }
     }

     function showHelp() {
         help.open()
     }
 }
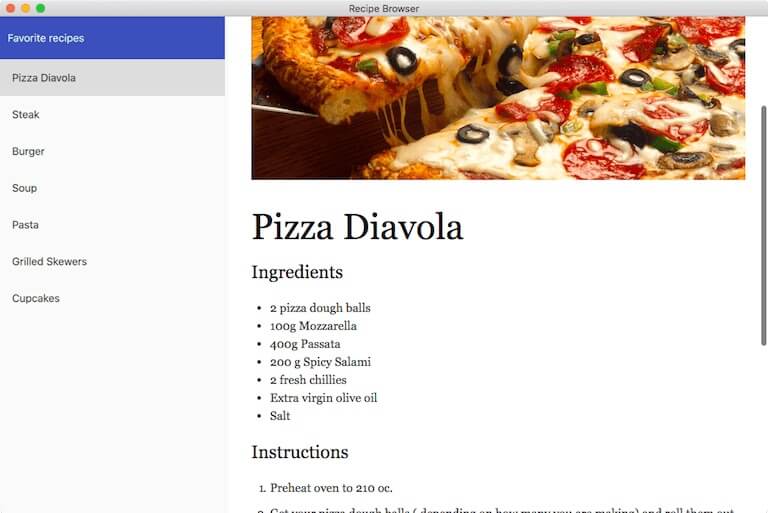
An example of a recipe page can be seen below. The page uses two stylesheets and two JavaScript files:
- markdown.css is a markdown-friendly stylesheet created by Kevin Burke
- marked.min.js is a markdown parser and compiler designed for speed written by Christopher Jeffrey
- custom.css makes some small styling adjustments to the final recipe page
- custom.js is used to invoke the conversion of the recipe content (which is written in markdown syntax) into HTML
The images on the pages are loaded from the compiled resource file.
 <!doctype html>
 <html lang="en">
 <head>
   <meta charset="utf-8">
   <title>Soup</title>
   <link rel="stylesheet" type="text/css" href="assets/3rdparty/markdown.css">
   <link rel="stylesheet" type="text/css" href="assets/custom.css">
 </head>
 <body>
   <div id="placeholder"></div>
   <div id="content">

 <img src="images/soup.jpg" alt="Soup" title="Soup" />

 Soup
 =============

 ### Ingredients

 * 2 potatoes
 * 2 onions
 * 2 cloves of garlic
 * olive oil
 * 400 ml organic stock
 * 3 bunches of watercress

 ### Instructions
 * Peel and roughly chop the potatoes, onions and garlic.
 * In a large saucepan, heat a little olive oil, then sauté the potato, onion and garlic until the onions are translucent.
 * Add the stock and simmer until the potato is soft. Chop and add the watercress and simmer for a further 3 to 4 minutes.
 * Using a hand blender, liquidise the soup until smooth.
 * Serve with a swirl of crème fraîche and some Fortt’s Bath Oliver biscuits, if you like.

 **Enjoy!**

   </div><!--End of content-->
   <script src="assets/3rdparty/marked.js"></script>
   <script src="assets/custom.js"></script>
 </body>
 </html>
Files and Attributions
The example bundles the following code with third-party licenses:
| Marked | MIT License |
| Markdown.css | Apache License 2.0 |