Axis Range Dragging With Labels Example
Implementing a custom input handler to support axis dragging.
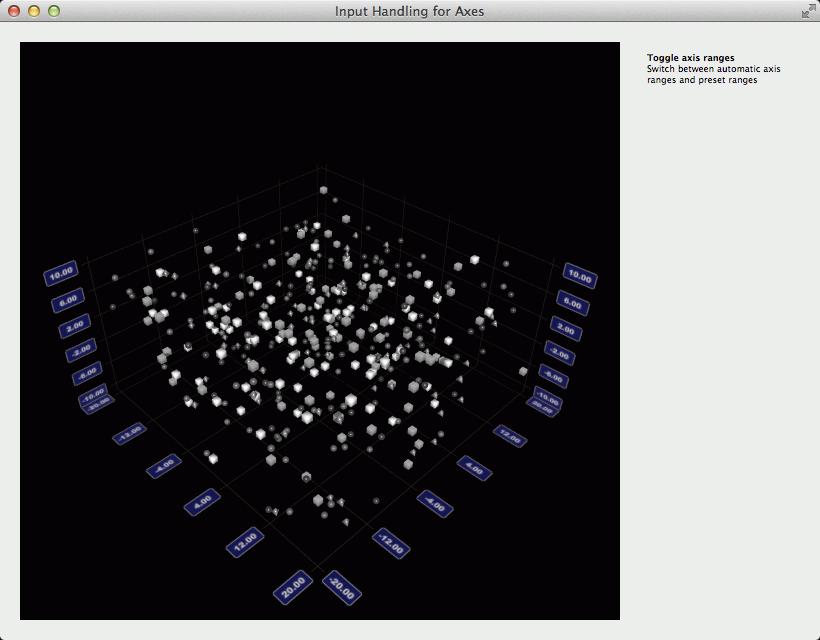
The Axis Range Dragging example shows how to customize the 3D graph controls in a widget application to allow changing axis ranges by clicking on an axis label and dragging. This is done by implementing a custom input handler to react to selection signals emitted from the graph.
Running the Example
To run the example from Qt Creator, open the Welcome mode and select the example from Examples. For more information, visit Building and Running an Example.
Replacing Default Input Handling
The default input handling mechanism is replaced by setting the active input handler of Q3DScatter to AxesInputHandler that implements the custom behavior:
 // Give ownership of the handler to the graph and make it the active handler
 m_graph->setActiveInputHandler(m_inputHandler);
m_inputHandler was initialized in the constructor:
m_inputHandler(new AxesInputHandler(scatter)),
We will also need the pointers to the axes, so we will pass them to our input handler too:
 // Give our axes to the input handler
 m_inputHandler->setAxes(m_graph->axisX(), m_graph->axisZ(), m_graph->axisY());
Extending Mouse Event Handling
First of all, we inherited our input handler from Q3DInputHandler instead of QAbstract3DInputHandler. The reason for doing this is to keep all the functionality of the default input handling, and to add our own functionality on top of it:
class AxesInputHandler : public Q3DInputHandler
We start extending the default functionality by re-implementing some of the mouse events. Let's start with mousePressEvent. We'll just add button pressed flag for left mouse button into it, and keep the rest of the default functionality:
 void AxesInputHandler::mousePressEvent(QMouseEvent *event, const QPoint &mousePos)
 {
     Q3DInputHandler::mousePressEvent(event, mousePos);
     if (Qt::LeftButton == event->button())
         m_mousePressed = true;
 }
We'll need to modify mouseReleaseEvent too to clear the flag and reset the internal state:
 void AxesInputHandler::mouseReleaseEvent(QMouseEvent *event, const QPoint &mousePos)
 {
     Q3DInputHandler::mouseReleaseEvent(event, mousePos);
     m_mousePressed = false;
     m_state = StateNormal;
 }
Then we'll modify mouseMoveEvent. Here we check if the m_mousePressed is true and our internal state is something other than StateNormal. If so, we'll set the input positions for mouse move distance calculations and call the axis dragging function (see Implementing axis dragging for details):
 void AxesInputHandler::mouseMoveEvent(QMouseEvent *event, const QPoint &mousePos)
 {
     // Check if we're trying to drag axis label
     if (m_mousePressed && m_state != StateNormal) {
         setPreviousInputPos(inputPosition());
         setInputPosition(mousePos);
         handleAxisDragging();
     } else {
         Q3DInputHandler::mouseMoveEvent(event, mousePos);
     }
 }
We don't need to change the functionality of mouse wheel, so we will not re-implement that.
Implementing Axis Dragging
First we need to start listening to the selection signal from the graph. We do that in the constructor, and connect it to handleElementSelected method:
 // Connect to the item selection signal from graph
 connect(graph, &QAbstract3DGraph::selectedElementChanged, this,
         &AxesInputHandler::handleElementSelected);
In handleElementSelected we check the type of the selection and set our internal state based on it:
 switch (type) {
 case QAbstract3DGraph::ElementAxisXLabel:
     m_state = StateDraggingX;
     break;
 case QAbstract3DGraph::ElementAxisYLabel:
     m_state = StateDraggingY;
     break;
 case QAbstract3DGraph::ElementAxisZLabel:
     m_state = StateDraggingZ;
     break;
 default:
     m_state = StateNormal;
     break;
 }
The actual dragging logic is implemented in handleAxisDragging method, which we call from mouseMoveEvent in case the required conditions are met:
 // Check if we're trying to drag axis label
 if (m_mousePressed && m_state != StateNormal) {
In handleAxisDragging we first get the scene orientation from our active camera:
 // Get scene orientation from active camera
 float xRotation = scene()->activeCamera()->xRotation();
 float yRotation = scene()->activeCamera()->yRotation();
Then we calculate the modifiers to mouse move direction based on the orientation:
 // Calculate directional drag multipliers based on rotation
 float xMulX = qCos(qDegreesToRadians(xRotation));
 float xMulY = qSin(qDegreesToRadians(xRotation));
 float zMulX = qSin(qDegreesToRadians(xRotation));
 float zMulY = qCos(qDegreesToRadians(xRotation));
After that, we calculate the mouse movement, and modify it based on the y rotation of the camera:
 // Get the drag amount
 QPoint move = inputPosition() - previousInputPos();

 // Flip the effect of y movement if we're viewing from below
 float yMove = (yRotation < 0) ? -move.y() : move.y();
And finally apply the moved distance to the correct axis:
 // Adjust axes
 switch (m_state) {
 case StateDraggingX:
     distance = (move.x() * xMulX - yMove * xMulY) / m_speedModifier;
     m_axisX->setRange(m_axisX->min() - distance, m_axisX->max() - distance);
     break;
 case StateDraggingZ:
     distance = (move.x() * zMulX + yMove * zMulY) / m_speedModifier;
     m_axisZ->setRange(m_axisZ->min() + distance, m_axisZ->max() + distance);
     break;
 case StateDraggingY:
     distance = move.y() / m_speedModifier; // No need to use adjusted y move here
     m_axisY->setRange(m_axisY->min() + distance, m_axisY->max() + distance);
     break;
 default:
     break;
 }
We also have a function for setting the dragging speed:
inline void setDragSpeedModifier(float modifier) { m_speedModifier = modifier; }
This is needed, as the mouse movement distance is absolute (in screen coordinates) and we need to adjust it to the axis range. The larger the value, the slower the dragging will be. Note that on this example we do not take scene zoom level into account when determining the drag speed, so you'll notice changes in the range adjustment as you change the zoom level.
The modifier could be adjusted automatically based on the axis range and camera zoom level, but we'll leave implementing that as an excercise for the reader.