Using a custom frame
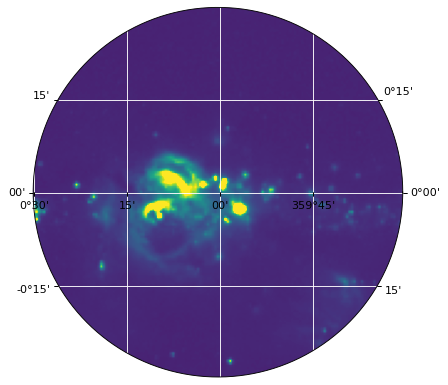
By default, WCSAxes will make use of a rectangular
frame for a plot, but this can be changed to provide any custom frame. The
following example shows how to use the built-in
EllipticalFrame class, which is an ellipse which extends to the same limits as the built-in rectangular frame:
from astropy.wcs import WCS
from astropy.io import fits
from astropy.utils.data import get_pkg_data_filename
from astropy.visualization.wcsaxes.frame import EllipticalFrame
import matplotlib.pyplot as plt

filename = get_pkg_data_filename('galactic_center/gc_msx_e.fits')
hdu = fits.open(filename)[0]
wcs = WCS(hdu.header)

ax = plt.subplot(projection=wcs, frame_class=EllipticalFrame)

ax.coords.grid(color='white')

im = ax.imshow(hdu.data, vmin=-2.e-5, vmax=2.e-4, origin='lower')

# Clip the image to the frame
im.set_clip_path(ax.coords.frame.patch)

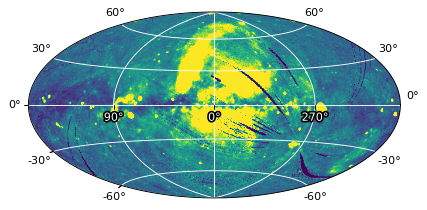
The EllipticalFrame class is especially useful for
all-sky plots such as Aitoff projections:
from astropy.wcs import WCS
from astropy.io import fits
from astropy.utils.data import get_pkg_data_filename
from astropy.visualization.wcsaxes.frame import EllipticalFrame
from matplotlib import patheffects
import matplotlib.pyplot as plt

filename = get_pkg_data_filename('allsky/allsky_rosat.fits')
hdu = fits.open(filename)[0]
wcs = WCS(hdu.header)

ax = plt.subplot(projection=wcs, frame_class=EllipticalFrame)

path_effects=[patheffects.withStroke(linewidth=3, foreground='black')]
ax.coords.grid(color='white')
ax.coords['glon'].set_ticklabel(color='white', path_effects=path_effects)

im = ax.imshow(hdu.data, vmin=0., vmax=300., origin='lower')

# Clip the image to the frame
im.set_clip_path(ax.coords.frame.patch)

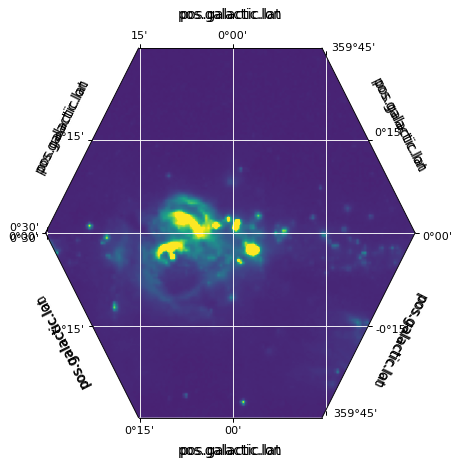
However, you can also write your own frame class. The idea is to set up any number of connecting spines that define the frame. You can define a frame as a spine, but if you define it as multiple spines you will be able to control on which spine the tick labels and ticks should appear.
The following example shows how you could for example define a hexagonal frame:
import numpy as np
from astropy.visualization.wcsaxes.frame import BaseFrame

class HexagonalFrame(BaseFrame):

    spine_names = 'abcdef'

    def update_spines(self):

        xmin, xmax = self.parent_axes.get_xlim()
        ymin, ymax = self.parent_axes.get_ylim()

        ymid = 0.5 * (ymin + ymax)
        xmid1 = (xmin + xmax) / 4.
        xmid2 = (xmin + xmax) * 3. / 4.

        self['a'].data = np.array(([xmid1, ymin], [xmid2, ymin]))
        self['b'].data = np.array(([xmid2, ymin], [xmax, ymid]))
        self['c'].data = np.array(([xmax, ymid], [xmid2, ymax]))
        self['d'].data = np.array(([xmid2, ymax], [xmid1, ymax]))
        self['e'].data = np.array(([xmid1, ymax], [xmin, ymid]))
        self['f'].data = np.array(([xmin, ymid], [xmid1, ymin]))
which we can then use:
from astropy.wcs import WCS
from astropy.io import fits
from astropy.utils.data import get_pkg_data_filename
import matplotlib.pyplot as plt

filename = get_pkg_data_filename('galactic_center/gc_msx_e.fits')
hdu = fits.open(filename)[0]
wcs = WCS(hdu.header)

ax = plt.subplot(projection=wcs, frame_class=HexagonalFrame)

ax.coords.grid(color='white')

im = ax.imshow(hdu.data, vmin=-2.e-5, vmax=2.e-4, origin='lower')

# Clip the image to the frame
im.set_clip_path(ax.coords.frame.patch)

Frame properties
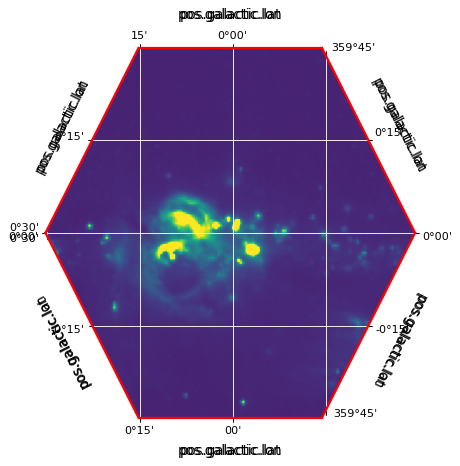
The color and linewidth of the frame can also be set by
ax.coords.frame.set_color('red')
ax.coords.frame.set_linewidth(2)
