
|
|

|
|
Once you have installed ArrayFire on your system, the next thing to do is set up your build system. On OSX, you may create ArrayFire project using almost any editor, compiler, or build system. The only requirement is that you can include the ArrayFire header directory, and link with the ArrayFire library you intend to use.
By default, the ArrayFire OSX installer will place several files in your computer's /usr/local directory. The installer will populate this directory with files in the following sub-directories:
include/arrayfire.h         - Primary ArrayFire include file
include/af/*.h              - Additional include files
lib/libaf*                  - CPU, CUDA, and OpenCL libraries (.a, .so)
lib/libforge*               - Visualization library
share/ArrayFire/cmake/*     - CMake config (find) scripts
share/ArrayFire/examples/*  - All ArrayFire examples
Because ArrayFire follows standard installation practices, you can use basically any build system to create and compile projects that use ArrayFire. Among the many possible build systems on Linux we suggest using ArrayFire with either CMake or Makefiles with CMake being our preferred build system.
We recommend that the CMake build system be used to create ArrayFire projects. If you are writing a new ArrayFire project in C/C++ from scratch, we suggest you grab a copy of our CMake Project Example; however, it is useful to read the documentation below in case you need to add ArrayFire to an existing project.
As discussed above, ArrayFire ships with a series of CMake scripts to make finding and using our library easy. The scripts will automatically find all versions of the ArrayFire library and pick the most powerful of the installed backends (typically CUDA).
First create a file called CMakeLists.txt in your project directory:
cd your-project-directory
touch CMakeLists.txt
and populate it with the following code:
FIND_PACKAGE(ArrayFire)
INCLUDE_DIRECTORIES(${ArrayFire_INCLUDE_DIRS})

... [gather source files, etc.]

# If you intend to use OpenCL, you need to find it
FIND_PACKAGE(OpenCL)
SET(EXTRA_LIBS ${CMAKE_THREAD_LIBS_INIT} ${OpenCL_LIBRARIES})

# Or if you intend to use CUDA, you need it as well as NVVM:
FIND_PACKAGE(CUDA)
FIND_PACKAGE(NVVM) # this FIND script can be found in the ArrayFire CMake example repository
SET(EXTRA_LIBS ${CMAKE_THREAD_LIBS_INIT} ${CUDA_LIBRARIES} ${NVVM_LIB})

ADD_EXECUTABLE(my_executable [list your source files here])
TARGET_LINK_LIBRARIES(my_executable ${ArrayFire_LIBRARIES} ${EXTRA_LIBS})
where my_executable is the name of the executable you wish to create. See the CMake documentation for more information on how to use CMake. Clearly the above code snippet precludes the use of both CUDA and OpenCL, see the ArrayFire CMake Example for an example of how to build executables for both backends from the same CMake script.
In the above code listing, the FIND_PACKAGE will find the ArrayFire include files, libraries, and define several variables including:
ArrayFire_INCLUDE_DIRS    - Location of ArrayFire's include directory.
ArrayFire_LIBRARIES       - Location of ArrayFire's libraries.
                            This will default to a GPU backend if one
                            is found
ArrayFire_FOUND           - True if ArrayFire has been located
If you wish to use a specific backend, the find script also defines these variables:
ArrayFire_CPU_FOUND         - True of the ArrayFire CPU library has been found.
ArrayFire_CPU_LIBRARIES     - Location of ArrayFire's CPU library, if found
ArrayFire_CUDA_FOUND        - True of the ArrayFire CUDA library has been found.
ArrayFire_CUDA_LIBRARIES    - Location of ArrayFire's CUDA library, if found
ArrayFire_OpenCL_FOUND      - True of the ArrayFire OpenCL library has been found.
ArrayFire_OpenCL_LIBRARIES  - Location of ArrayFire's OpenCL library, if found
ArrayFire_Unified_FOUND     - True of the ArrayFire Unified library has been found.
ArrayFire_Unified_LIBRARIES - Location of ArrayFire's Unified library, if found
Therefore, if you wish to target a specific specific backend, simply replace ${ArrayFire_LIBRARIES} with ${ArrayFire_CPU}, ${ArrayFire_OPENCL}, ${ArrayFire_CUDA}, or ${ArrayFire_Unified} in the TARGET_LINK_LIBRARIES command above. If you intend on building your software to link with all of these backends, please see the CMake Project Example which makes use of some fairly fun CMake tricks to avoid re-compiling code whenever possible.
Next we need to instruct CMake to create build instructions and then compile. We suggest using CMake's out-of-source build functionality to keep your build and source files cleanly separated. To do this:
cd your-project-directory
mkdir build
cd build
cmake ..
make
NOTE: If you have installed ArrayFire to a non-standard location, CMake can still help you out. When you execute CMake specify the path to the ArrayFireConfig* files that are found in the share/ArrayFire/cmake subdirectory of the installation folder. For example, if ArrayFire were installed locally to /opt/ArrayFire then you would modify the cmake command above to contain the following definition:
cmake -DArrayFire_DIR=/opt/ArrayFire/share/ArrayFire/cmake ..
You can also specify this information in the ccmake command-line interface.
Building ArrayFire projects with Makefiles is fairly similar to CMake except you must specify all paths and libraries manually. As with any make project, you need to specify the include path to the directory containing arrayfire.h file. This should be -I /usr/local/include if you followed our installation instructions. Similarly, you will need to specify the path to the ArrayFire library using the -L option (e.g. -L/usr/local/lib) followed by the specific ArrayFire library you wish to use using the -l option (for example -lafcpu, -lafopencl, -lafcuda, or -laf for the CPU, OpenCL, CUDA, and unified backends respectively.
Here is a minimial example MakeFile which uses ArrayFire's CPU backend:
LIBS=-lafcpu
LIB_PATHS=-L/usr/lib
INCLUDES=-I/usr/include
CC=g++ $(COMPILER_OPTIONS)
COMPILER_OPTIONS=-std=c++11 -g

all: main.cpp Makefile
    $(CC) main.cpp -o test $(INCLUDES) $(LIBS) $(LIB_PATHS)
Although we recommend using CMake to build ArrayFire projects on OSX, you can use XCode if this is your preferred development platform. To save some time, we have created an sample XCode project in our ArrayFire Project Templates repository.
To set up a basic C/C++ project in XCode do the following:
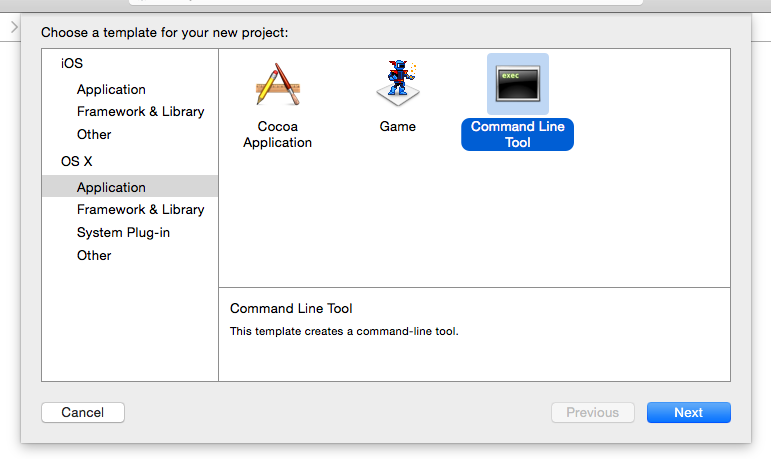
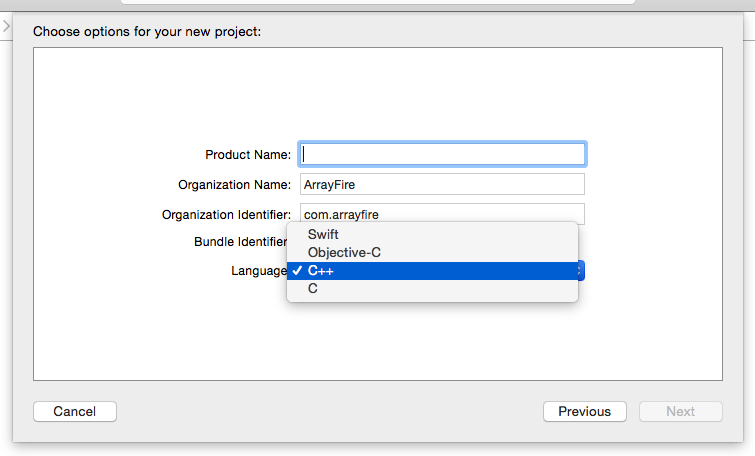
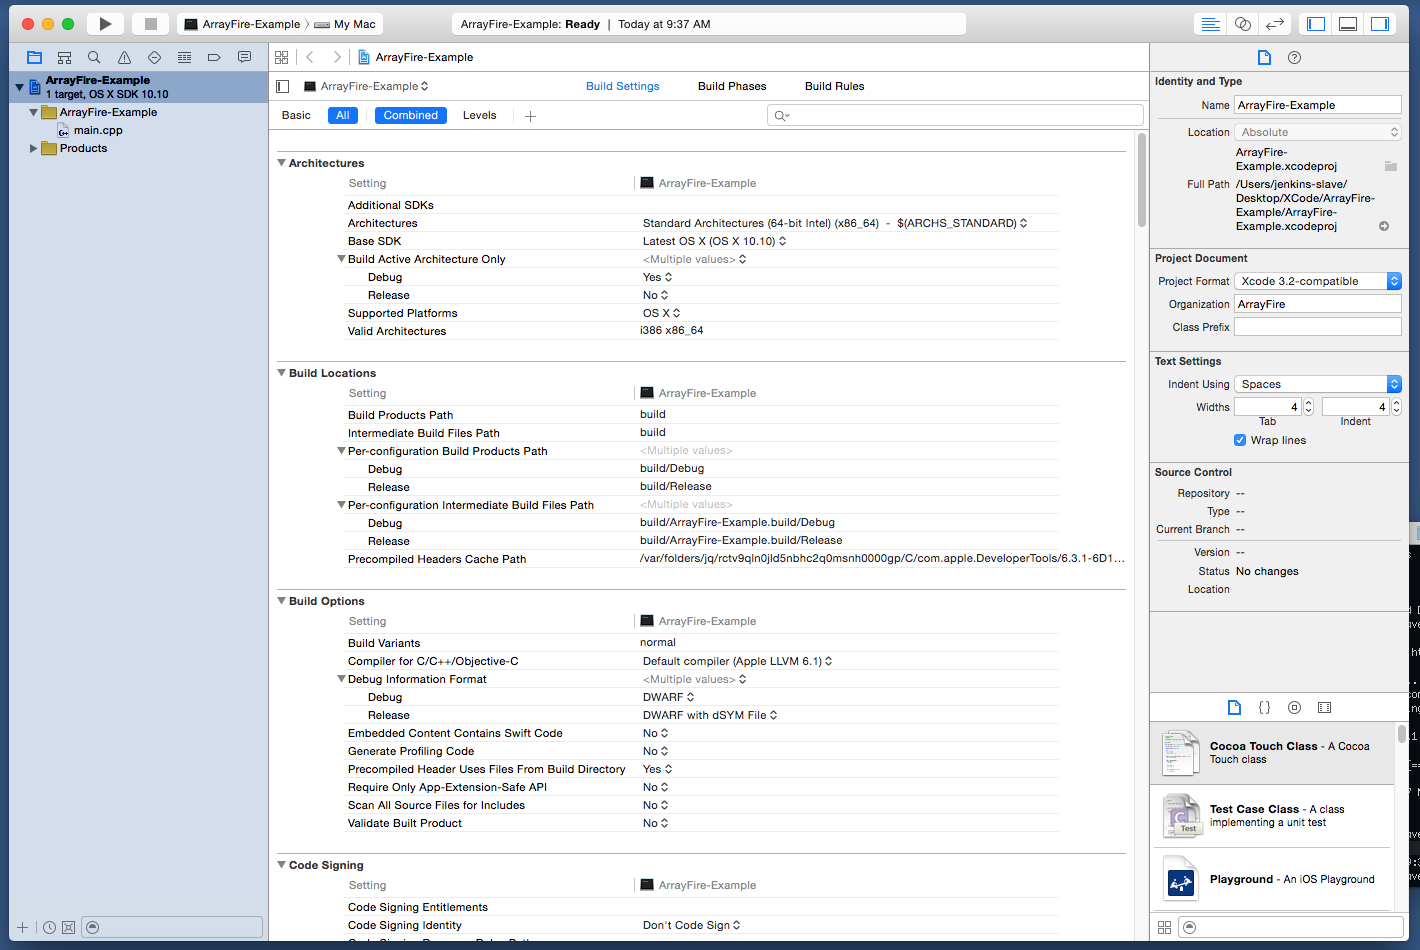
/usr/local/include to the list:
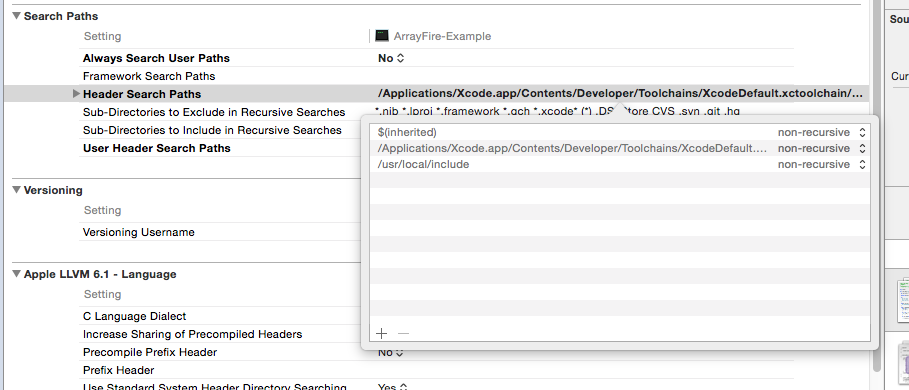
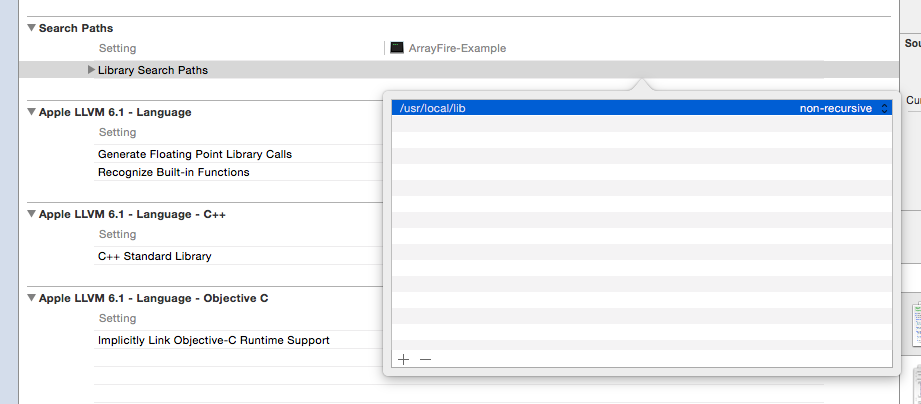
/usr/local/lib to the list:

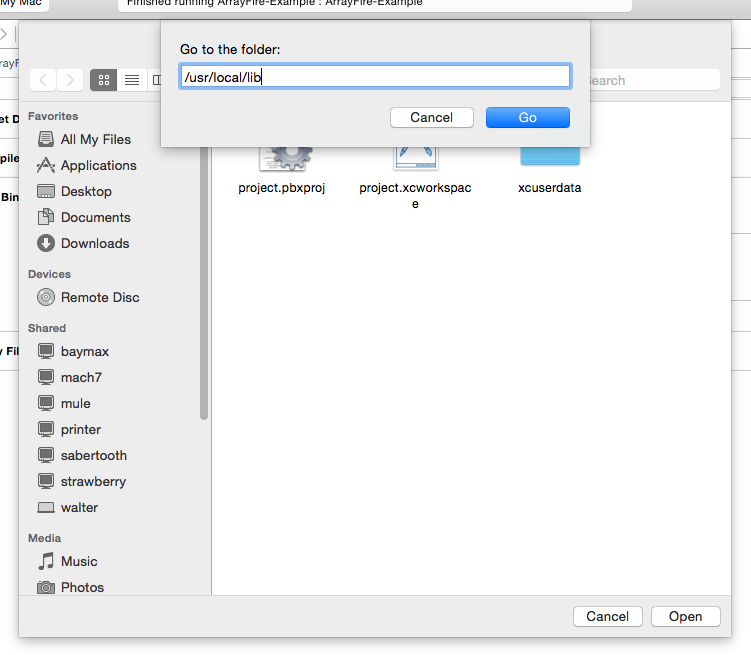
/usr/local/lib folder:
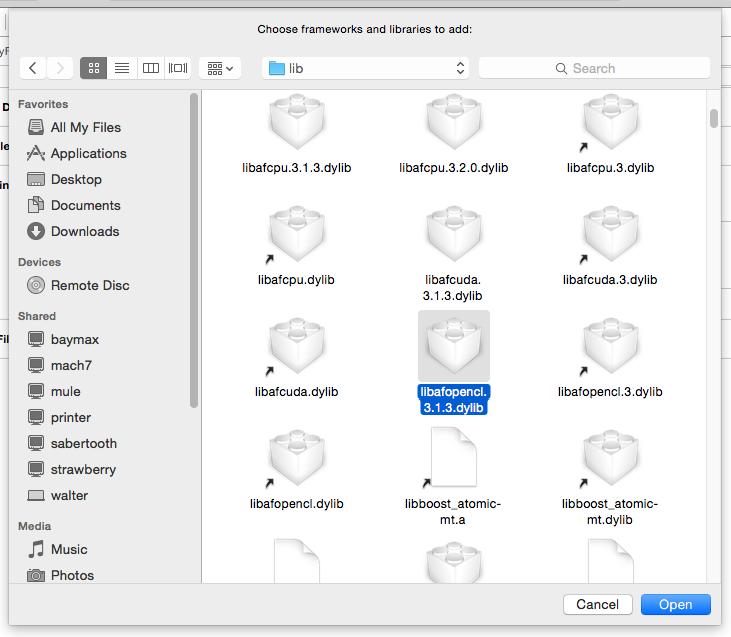
Finally, click the build button and you should see some information about your graphics card in the lower-section of your screen: