Quickstart
This page gives a good introduction in how to get started with Glances. Glances offers 3 modes:
Standalone
Client/Server
Web server
Standalone Mode
If you want to monitor your local machine, open a console/terminal and simply run:
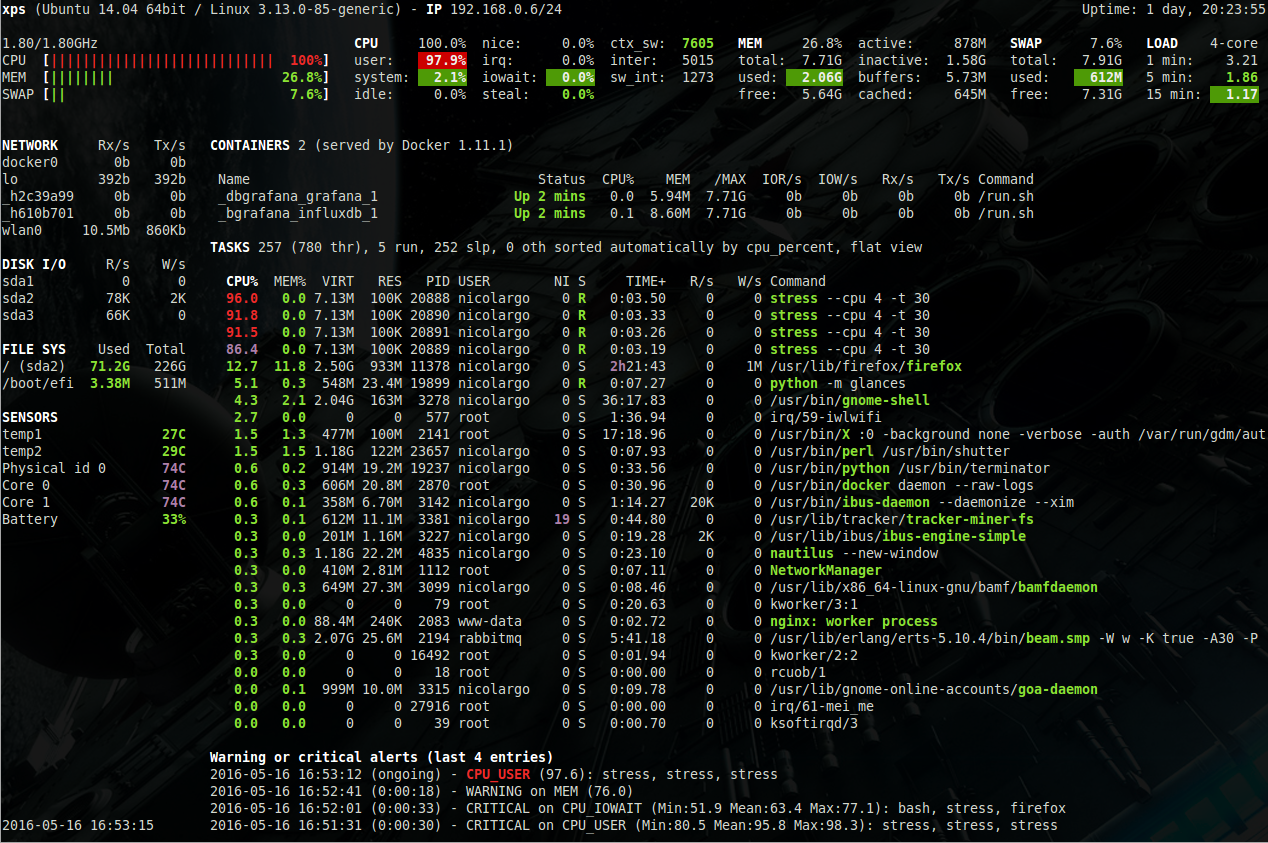
$ glances
Glances should start (press ‘q’ or ‘ESC’ to exit):
It is also possible to display RAW (Python) stats directly to stdout using:
$ glances --stdout cpu.user,mem.used,load
cpu.user: 30.7
mem.used: 3278204928
load: {'cpucore': 4, 'min1': 0.21, 'min5': 0.4, 'min15': 0.27}
cpu.user: 3.4
mem.used: 3275251712
load: {'cpucore': 4, 'min1': 0.19, 'min5': 0.39, 'min15': 0.27}
...
or in a CSV format thanks to the stdout-csv option:
$ glances --stdout-csv now,cpu.user,mem.used,load
now,cpu.user,mem.used,load.cpucore,load.min1,load.min5,load.min15
2018-12-08 22:04:20 CEST,7.3,5948149760,4,1.04,0.99,1.04
2018-12-08 22:04:23 CEST,5.4,5949136896,4,1.04,0.99,1.04
...
or as a JSON format thanks to the stdout-json option (attribute not supported in this mode):
$ glances --stdout-json cpu,mem
cpu: {"total": 29.0, "user": 24.7, "nice": 0.0, "system": 3.8, "idle": 71.4, "iowait": 0.0, "irq": 0.0, "softirq": 0.0, "steal": 0.0, "guest": 0.0, "guest_nice": 0.0, "time_since_update": 1, "cpucore": 4, "ctx_switches": 0, "interrupts": 0, "soft_interrupts": 0, "syscalls": 0}
mem: {"total": 7837949952, "available": 2919079936, "percent": 62.8, "used": 4918870016, "free": 2919079936, "active": 2841214976, "inactive": 3340550144, "buffers": 546799616, "cached": 3068141568, "shared": 788156416}
...
Note: It will display one line per stat per refresh.
Client/Server Mode
If you want to remotely monitor a machine, called server, from
another one, called client, just run on the server:
server$ glances -s
and on the client:
client$ glances -c @server
where @server is the IP address or hostname of the server.
In server mode, you can set the bind address with -B ADDRESS and
the listening TCP port with -p PORT.
In client mode, you can set the TCP port of the server with -p PORT.
Default binding address is 0.0.0.0 (Glances will listen on all the
available network interfaces) and TCP port is 61209.
In client/server mode, limits are set by the server side.
Central client

Glances can centralize available Glances servers using the --browser
option. The server list can be statically defined via the configuration
file (section [serverlist]).
Example:
[serverlist]
# Define the static servers list
server_1_name=xps
server_1_alias=xps
server_1_port=61209
server_2_name=win
server_2_port=61235
Glances can also detect and display all Glances servers available on
your network via the zeroconf protocol (not available on Windows):
To start the central client, use the following option:
client$ glances --browser
Note
Use --disable-autodiscover to disable the auto discovery mode.
When the list is displayed, you can navigate through the Glances servers with up/down keys. It is also possible to sort the server using: - ‘1’ is normal (do not sort) - ‘2’ is using sorting with ascending order (ONLINE > SNMP > PROTECTED > OFFLINE > UNKNOWN) - ‘3’ is using sorting with descending order (UNKNOWN > OFFLINE > PROTECTED > SNMP > ONLINE)
SNMP
As an experimental feature, if Glances server is not detected by the
client, the latter will try to grab stats using the SNMP protocol:
client$ glances -c @snmpserver
Note
Stats grabbed by SNMP request are limited and OS dependent. A SNMP server should be installed and configured…
IPv6
Glances is IPv6 compatible. Just use the -B :: option to bind to
all IPv6 addresses.
Web Server Mode
If you want to remotely monitor a machine, called server, from any
device with a web browser, just run the server with the -w option:
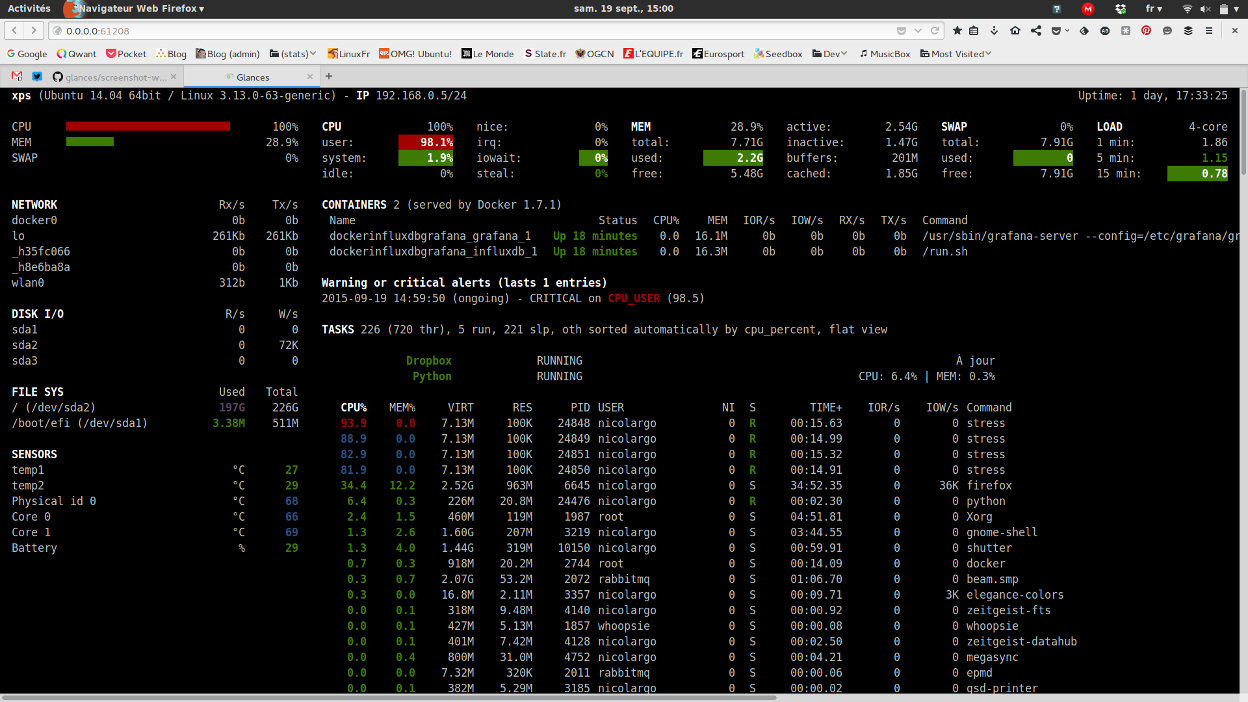
server$ glances -w
then on the client enter the following URL in your favorite web browser:
http://@server:61208
where @server is the IP address or hostname of the server.
To change the refresh rate of the page, just add the period in seconds
at the end of the URL. For example, to refresh the page every 10
seconds:
http://@server:61208/10
The Glances web interface follows responsive web design principles.
Here’s a screenshot from Chrome on Android:

How to protect your server (or Web server) with a login/password ?
You can set a password to access to the server using the --password.
By default, the login is glances but you can change it with
--username.
If you want, the SHA password will be stored in <login>.pwd file (in
the same folder where the Glances configuration file is stored, so
~/.config/glances/ on GNU Linus operating system).
Next time your run the server/client, password will not be asked. To set a specific username you can used the -u <username> option.
It is also possible to set the default password in the Glances configuration file:
[passwords]
# Define the passwords list
# Syntax: host=password
# Where: host is the hostname
#        password is the clear password
# Additionally (and optionally) a default password could be defined
localhost=mylocalhostpassword
default=mydefaultpassword