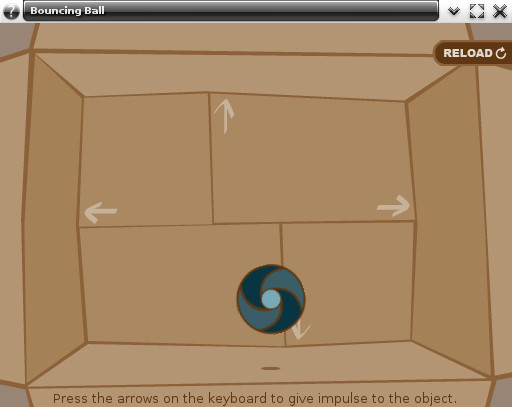
The purpose of this example is to show how to write an simple application - as the name suggests - with a small ball bouncing on the ground and responding to users events by making it jump - applying a central impulse on it.

We'll guide you on defining a EPhysics world, defining its render geometry and the physics limiting boundaries, you'll learn how to add EPhysics bodies and how to associate it to evas objects. We also explain how to change restitution and friction properties. We see how to apply central impulse on a EPhysics_Body by implementing an elementary input event callback and calling the proper function.
A test struct
While in this example we'll be working with a struct to hold some objects in our code. For clarity sake we present you the struct declaration in the following block.
World Initialization
Calling ephysics_world_new() will create a new physics world with its collision configuration, constraint solver, broadphase interface and dispatcher.
The default gravity is set to -9.81. It's possible to stop a running world but its default status is running. Take a look at ephysics_world_running_set() for further informations about world running status.
Render geometry
By setting the render geometry you tell ephysics the dimensions of rendered area to be take on account by default updates.
By default it starts with null x, y, z, width, height and depth. Initially there's no physics limits but - as we'll see later in this example - boundaries can be added by issuing either ephysics_body_top_boundary_add(), ephysics_body_bottom_boundary_add(), ephysics_body_left_boundary_add() and ephysics_body_right_boundary_add().
While setting the worlds render geometry the first parameter is our just created world, the following parameters indicate the x, y, z, width, height and depth of our area of interest.
Adding boundaries
Boundaries are physics limits added by EPhysics which you can use to limit the area where your objects can move around. Bear in mind that those boundaries are created by EPhysics taking in account the render geometry you have previously defined by calling ephysics_world_render_geometry_set().
In our example we start by adding a bottom boundary. This EPhysics_Body represents a physics limit under the world render geometry.
The second line states the restitution factor for that bottom boundary, and the third line its friction. These changes will make our ball to bounce whenever it hits the ground.
Then we add a right boundary limiting the physics world on the left side, we also change its restitution and friction factors but with a smaller value, we don't want to make it bounce as much as it is when hits the ground.
We also add a left boundary taking the same considerations for right boundary.
One of this examples requirements is to make the ball jump after a specific user event, so the ball can suffer an impulse for any direction.
With an upper impulse we don't want our ball to fly all over there, we want to limit its upper movements, it's intended to limit the ball movement within a box, it should not leave the render geometry area, for that purpose we must define a top boundary.
Adding a ball
Since we have defined the physics limits with our boundaries it's time to add some fun. Here we add a ball as an elementary image widget and tell ephysics about it.
After setting the file that will be used as the image's source of our elm image we move it to the center of render geometry and resize it to 70x70 pixels and show it.
The evas object is just set and we must tell EPhysics about it, creating the EPhysics_Body representing our ball and associating it to the just created evas object.
Once the ball has been moved to the center of render geometry it should start falling after associating it to the EPhysics_Body. By default its mass is initially set to 1 kilo, but it can be changed by calling ephysics_body_mass_set(). Bear in mind that if you change its mass to 0 kilos it becomes a static body and will not move at all, the body will remain fixed in the initial position.
In the following code the first line adds a circle body, then we associate the evas object to EPhysics_Body, EPhysics will map every changes on physics object simulation to its evas object. Some restitution and friction factors are added as well.
Making it jump
The next step is to give us the ability to make our ball to jump - actually apply some impulse whenever a key has been pressed. Then we add a elementary input callback to the window widget.
The jumping callback implementation consists on handling only key up events and discarding any other input event we get. We're interested on keyboard events only. All the operations done in the following lines are done on sphere EPhysics_Body previously created.
We mainly use the ephysics_body_central_impulse_apply() function. This function applies an impulse on the center of a body.
Once pressed <Up> key it applies a central impulse of 0 kilos on X axis, 10 kilos on Y and 0 kilos on Z - so the ball is forced up.
If <Down> key has been pressed we apply an impulse of 0 kilos on X axis, -10 kilos on Y and 0 kilos on Z - here the ball is forced down.
In the case of <Right> key pressing it's applied an impulse of 10 kilos on X axis, 0 kilos on Y and 0 kilos on Z - which applies a force to the right side. But if the key being pressed is <Left> the opposite is done, and an impulse of -10 kilos is applied on X, 0 kilos on Y and 0 kilos on Z - and the ball is forced to the left.
Here we finish the very simple bouncing ball example. The full source code can be found at test_bouncing_ball.c.