Transitions
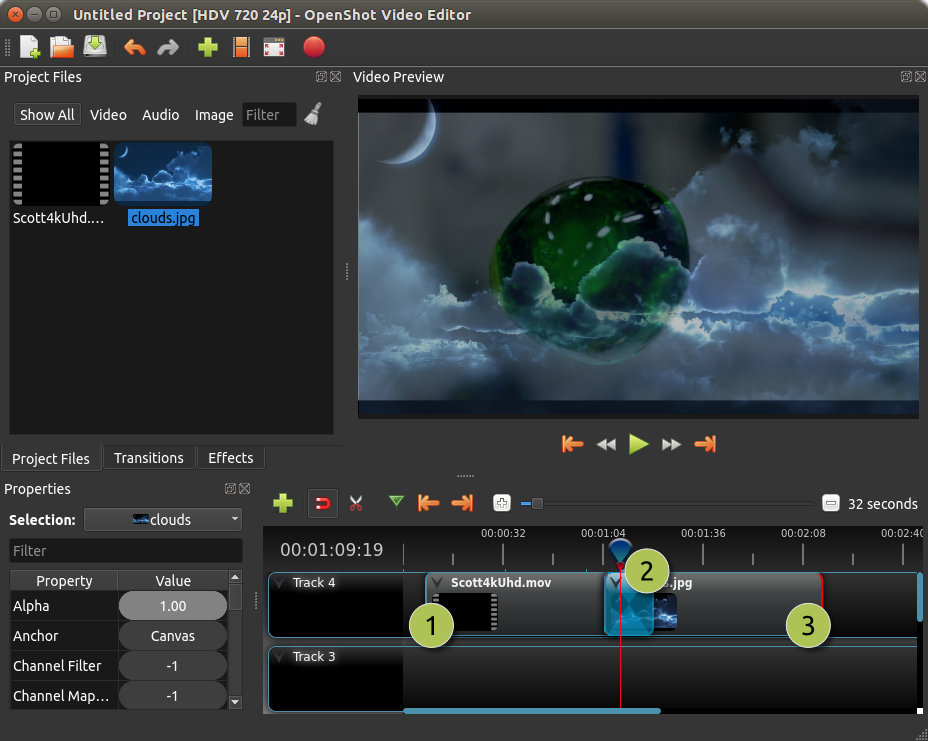
A transition is used to gradually fade (or wipe) between two clips. In OpenShot, transitions are represented by blue, rounded rectangles on the timeline. They are automatically created when you overlap two clips, and can be added manually by dragging one onto the timeline from the Transitions panel. A transition must be placed on top of a clip (overlapping it), with the most common location being the beginning or end.
Overview
# |
Name |
Description |
|---|---|---|
1 |
Clip 1 |
A video clip |
2 |
Transition |
A gradual fade transition between the 2 clips, created automatically by overlapping the clips. |
3 |
Clip 2 |
An image clip |
Direction
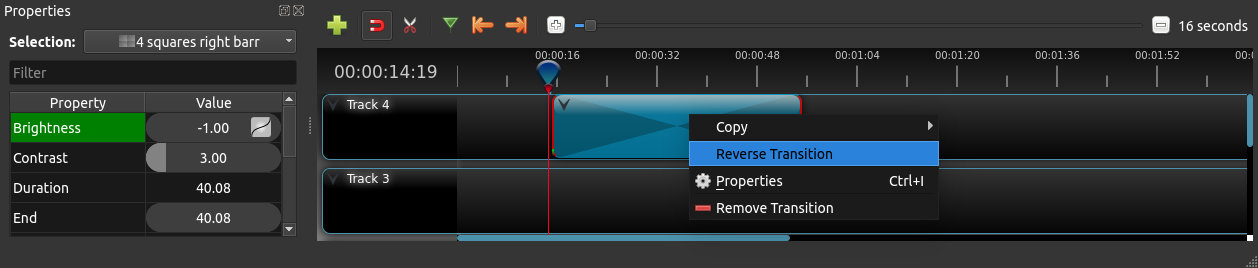
Transitions adjust the alpha/transparency of the clip below it, and can either fade from opaque to transparent, or transparent to opaque. Right click and choose Reverse Transition to change the direction of the fade. You can also manually adjust the Brightness curve, animating the fade in any way you wish.
Cutting & Slicing
OpenShot has many easy ways to adjust the start and end positions of a transition (otherwise known as cutting). The most common method is simply grabbing the left (or right) edge of the transition and dragging. Here is a list of methods for cutting transitions in OpenShot:
Keep in mind that all of the above cutting methods also have Keyboard Shortcuts.
Mask
Like Clips, transitions also have properties which can be animated over time. The fade (or wipe) can be adjusted with the Brightness curve, or held at a constant value to create a transparency mask on top of a clip.
Custom Transition
Any greyscale image can be used as a transition (or mask), by adding it to your /.openshot_qt/transitions/ folder. Just be sure to name your file something that is easily recognizable, and restart OpenShot. Your custom transition/mask will now show up in the list of transitions.
Properties
Below is a list of transition properties which can be edited, and in most cases, animated over time. To view a transition’s properties, right click and choose Properties. The property editor will appear, where you can change these properties. NOTE: Pay close attention to where the play-head (i.e. red playback line) is. Key frames are automatically created at the current playback position, to help create animations.