Quick Tutorial
Using OpenShot is very easy, and this tutorial will take you through the basics in under 5 minutes. After this tutorial, you will be able to make a simple photo slide-show with music.
Basic Terminology
To help understand the steps below, here are some definitions of a few basic terms used in this tutorial.
Term |
Description |
|---|---|
Project |
A project includes references to all the video files and edits (animations, titles, etc…), saved in a single file. |
Timeline |
The timeline is an editing user interface that represents edits and clips on a horizontal ruler. Time progresses from left to right. |
Track |
A separate layer on the timeline, which can hold clips. A timeline is made up of many tracks, stacked vertically. |
Clip |
A trimmed portion of video, audio, or both positioned on a track, and at a specific position in time. When files are dropped on the timeline, they are represented as a Clip. |
Transition |
A method to blend two images. Transitions can take many forms, including cuts, dissolves, and wipes. |
Video Tutorials
If you prefer to learn by watching videos instead of reading, we have many official video tutorials that cover a wide range of beginner and introductory topics. These videos are a great next step on your way to master OpenShot Video Editor!
Step 1 – Import Photos & Music
Before we can begin making a video, we need to import media files into OpenShot. Most video, image and music file formats will work. Drag and drop a few videos or images and a music file from your Desktop to OpenShot. Be sure to drop the files where the arrow in the illustration is pointing to.
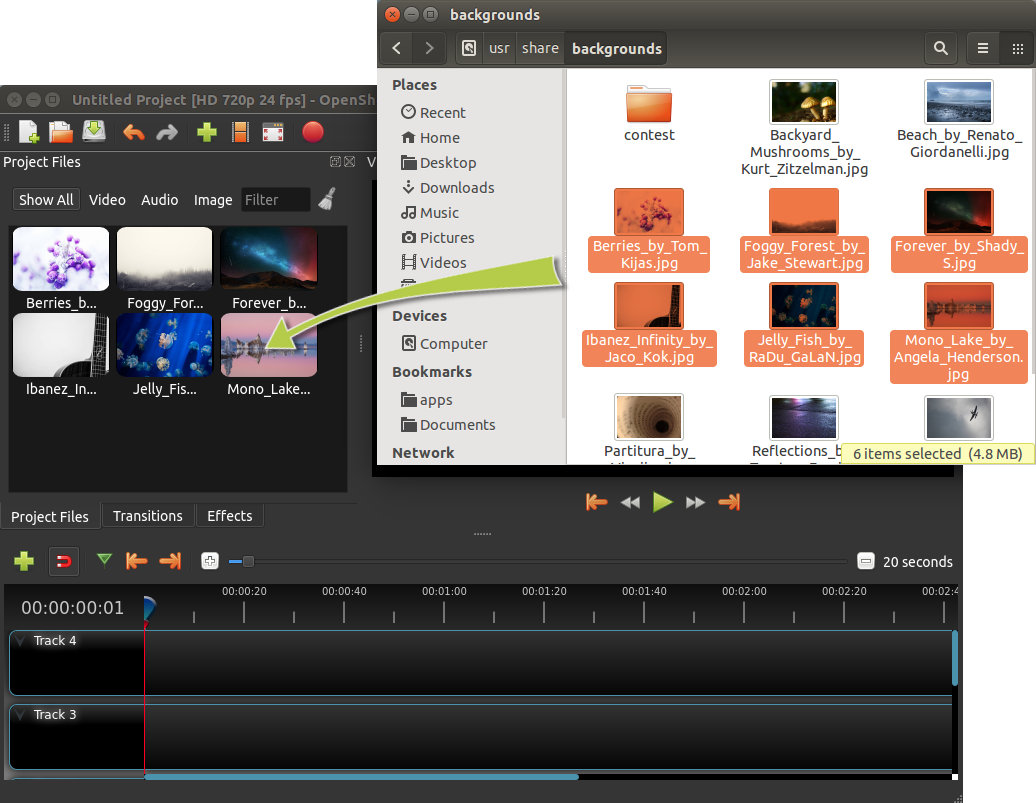
Alternative methods to add files to your projects are described in the section Import Files. The “Show All”, “Video”, “Audio”, “Image” filters above the added files allows you to only see the file types you are interested in.
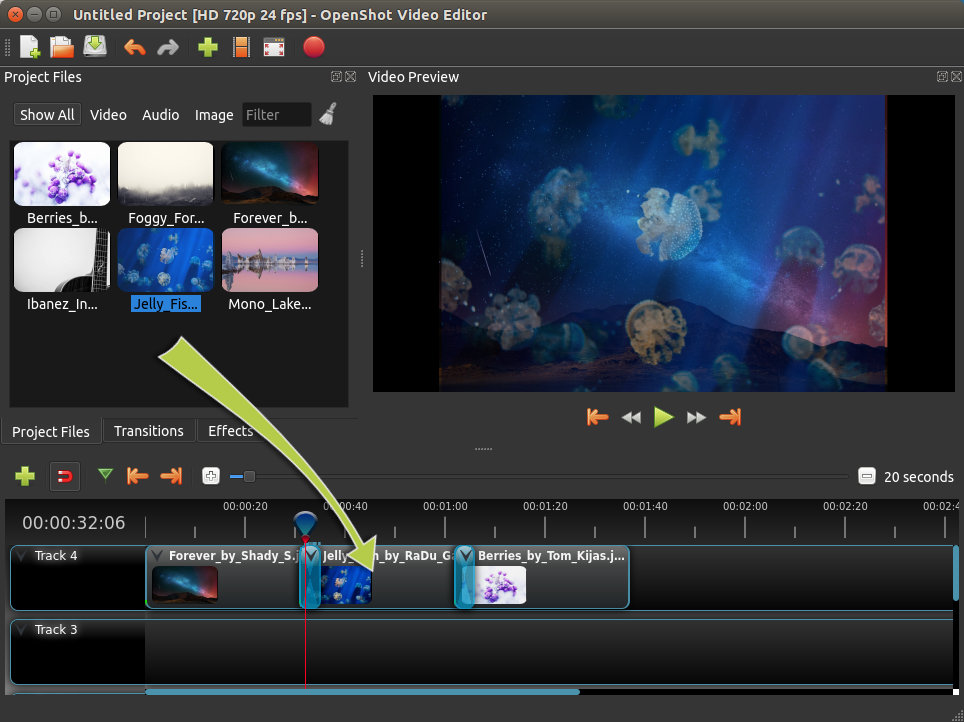
Step 2 – Add Photos to Timeline
Next, drag each video or photo onto a track in the timeline (as seen in the illustration). The timeline represents your final video, so arrange your photos (i.e. clips) in whatever sequence you want them to appear in your video. If you overlap two clips, OpenShot will automatically create a smooth fade between them, displayed by blue rounded rectangles between the clips. Remember, you can rearrange the clips as many times as needed by simply dragging and dropping them.
You can also shorten or lengthen each clip, by clicking the left or right edge and dragging your mouse. For example, if you want a photo to last longer than 10 seconds (the default duration), simply grab the right edge of the photo (on the timeline), and drag it to the right (to increase the clip’s duration on the timeline).
Step 3 – Add Music to Timeline
To make our creation more interesting, we need to add some music. Click on the music file that you imported in step 1, and drag it onto the timeline. If the song is too long, grab the right edge of your music clip, and resize it smaller (that will make it end earlier). You could also insert the same file multiple times, if your music is too short.

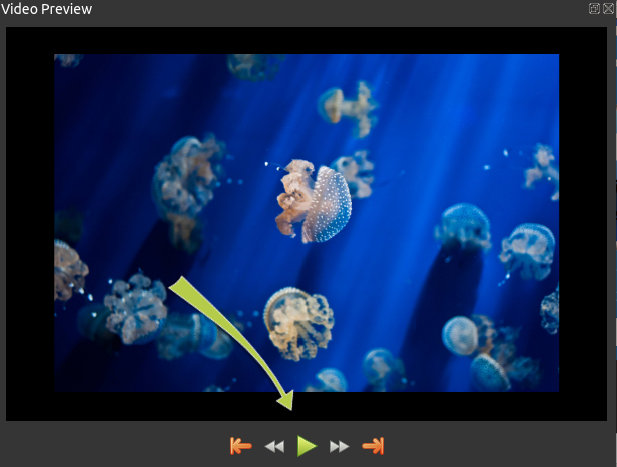
Step 4 – Preview your Project
To preview what our video looks & sounds like, click the Play button under the preview window. You can also pause, rewind, and fast-forward your video project by clicking the corresponding buttons.
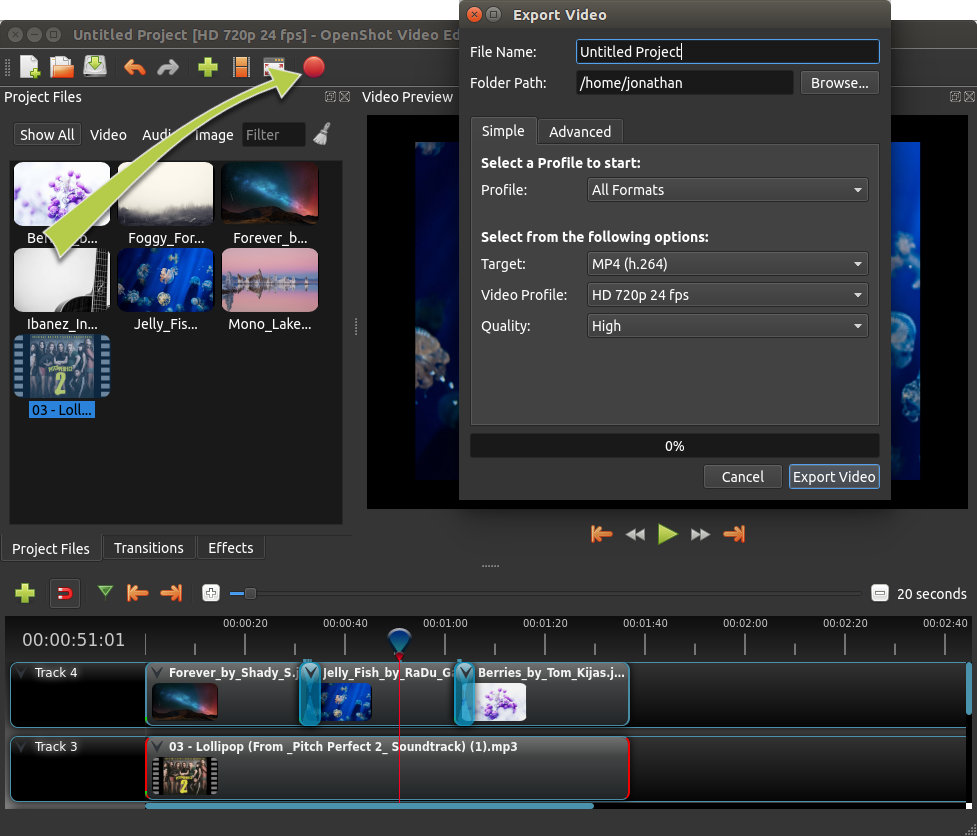
Step 5 – Export your Video
Once you have edited your photo slide-show video, the last step is to export the project. Exporting converts your OpenShot project into a single video output file. By using the default settings, the video works on most media players (such as VLC) or websites (such as YouTube, Vimeo, …).
Click on the Export Video icon at the top of the screen (or use the File→Export Video menu). The default values will work fine, so just click the Export Video button to render your new video.
Conclusion
You should now have a basic understanding of how OpenShot works. Importing, Arranging, Previewing, and Exporting. Hopefully this tutorial took less than 5 minutes for you to complete. Please read the rest of this guide for a more detailed understanding of OpenShot and its advanced features.
If you have any questions after reading this User Guide, please consider joining our Reddit User Community to discuss topics, ask questions, and meet with other OpenShot users.