Files
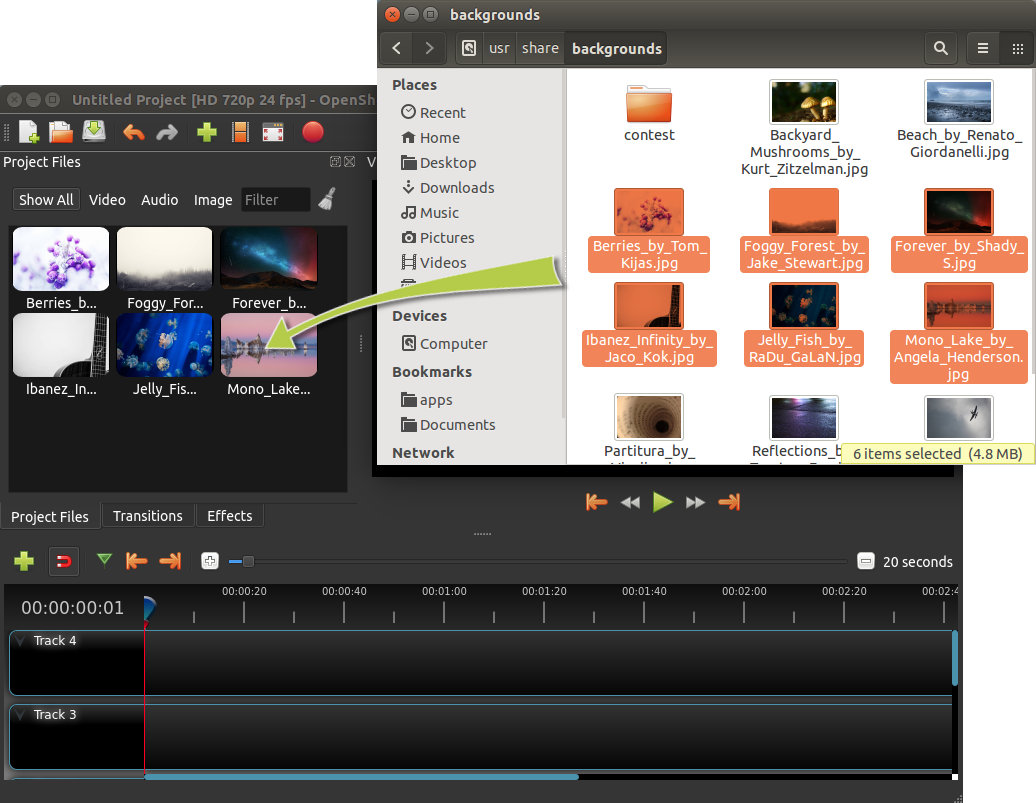
To create a video, we need to make media files available to our project by importing files into OpenShot. Most media file types are recognized, such as videos, images, and audio files. Files can be viewed and managed in the Project Files panel.
Note that imported files are not copied anywhere, they remain in the physical location they were before and are simply being made available to your video project. So, they must not be deleted, renamed, or moved after adding them to your project. The “Show All”, “Video”, “Audio”, “Image” filters above the files allows you to only see the file types you are interested in. You can also toggle the view between details and thumbnails view of your files.
Import Files
These are all possible methods to import media files into OpenShot:
File Menu
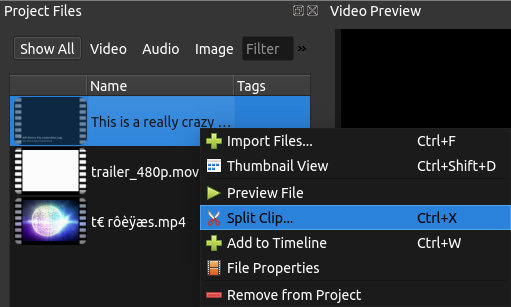
To view the file menu, right click on a file (in the Project Files panel). Here are the actions you can use from the file menu.
Name |
Description |
|---|---|
Import Files… |
Import files into your project |
Thumbnail/Detail |
Toggle the view between details and thumbnails |
Preview File |
Preview a media file |
Split Clip… |
Split a file into many smaller clips |
Edit Title |
Edit an existing title SVG file |
Duplicate Title |
Make a copy, and then edit the copied title SVG file |
Add to Timeline |
Add many files to the timeline in one step |
File Properties |
View the properties of a file, such as frame rate, size, etc… |
Remove from Project |
Remove a file from the project |
Split Clip
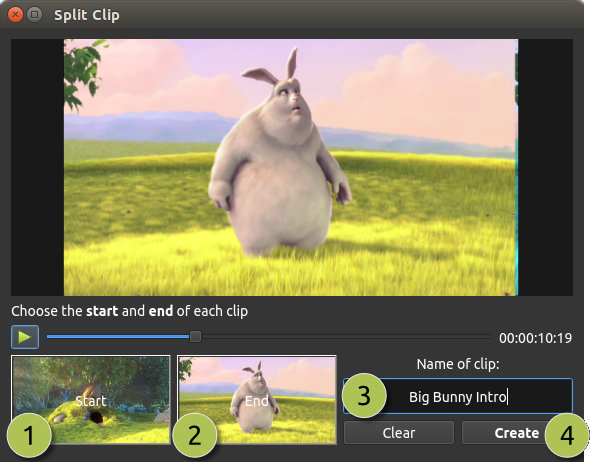
If you need to cut a file into many smaller clips before editing, the Split Clip dialog is built exactly for this purpose. Right click on a file, and choose Split Clip… from the file menu. This opens the Split Clip dialog. Use this dialog to quickly cut out as many small clips as you need. The dialog stays open after you create a clip, to allow you to repeat the steps for your next clip. When you are finished, simply close the dialog.
Please refer to the section Trimming & Slicing for more ways to cut and slice clips directly in the timeline.
Export Clips
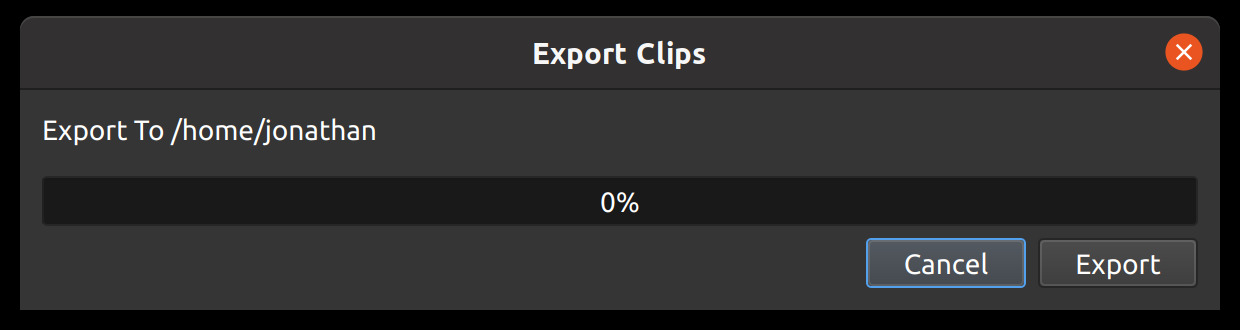
If you want your clips available outside of your OpenShot project, or want to copy all your video assets to one place, you can do this with the Export Clips dialog. Simply Ctrl+Click to select any clips or files you like, then Right Click and choose Export Clips. In the dialog that appears, choose a destination folder, and click Export.
NOTE: This will export each clip using it’s original video profile (width, height, framerate, aspect ratio, etc…). It also supports any Split Clip (described above). For example, if you have split a long video file into many different clips (and named them), you can now export all the clips as separate video files (using the original clip’s video profile).
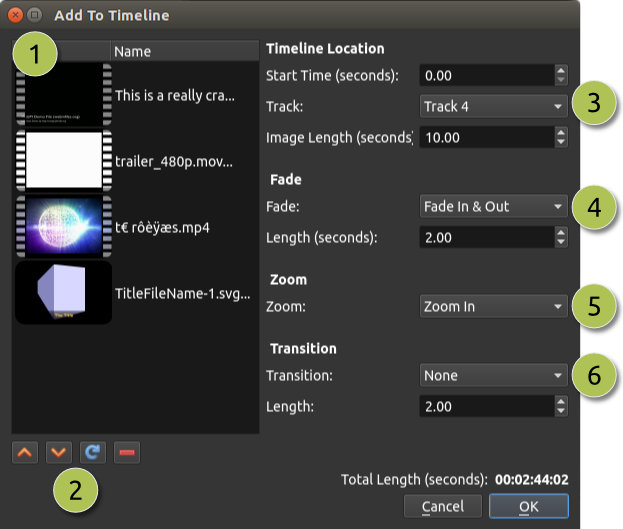
Add to Timeline
In certain cases, you might need to add many files to the timeline at the same time. For example, a photo slide show, or a large number of short video clips. The Add to Timeline dialog can automate this task for you. First, select all files you need to add, right click, and choose Add to Timeline.
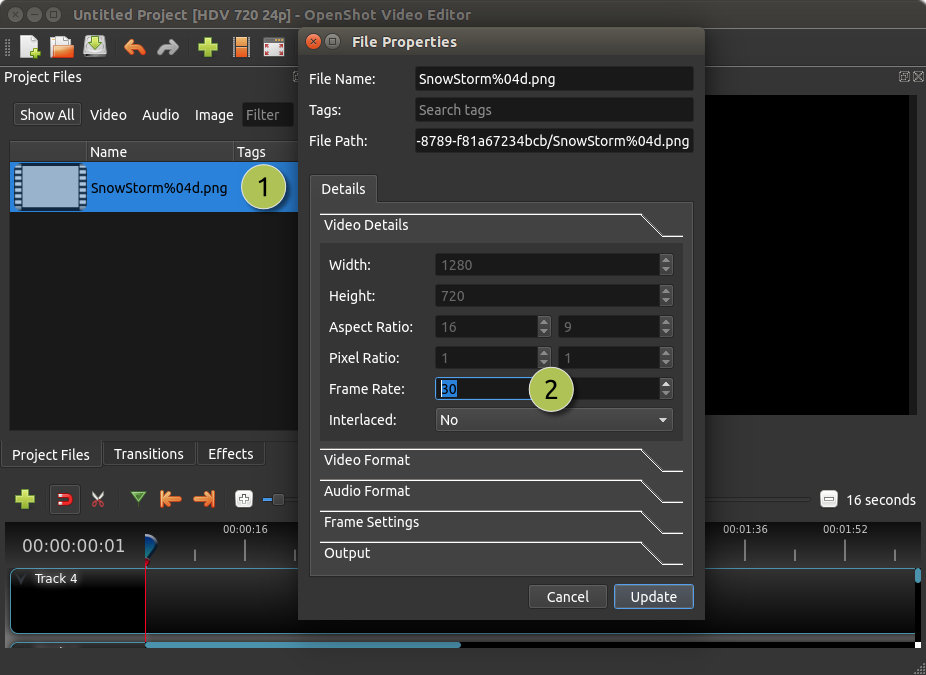
Properties
To view the properties of any imported file in your video project, right click on the file, and choose File Properties. This will launch the file properties dialog, which displays information about your media file. For certain types of images (i.e. image sequences), you can adjust the frame rate on this dialog also.
# |
Name |
Description |
|---|---|---|
1 |
File Properties |
Select an image sequence in the Project Files panel, right click and choose File Properties |
2 |
Frame Rate |
For image sequences, you can also adjust the frame rate of the animation |
Remove from Project
This will remove a file from the project. It will not delete the underlying physical file though, so removing a file from the project merely makes it unavailable for this video project.