Animation
OpenShot has been designed specifically with animation in mind. The powerful curve-based animation framework can handle most jobs with ease, and is flexible enough to create just about any animation. Key frames specify values at certain points on a clip, and OpenShot does the hard work of interpolating the in-between values.
Overview
# |
Name |
Description |
|---|---|---|
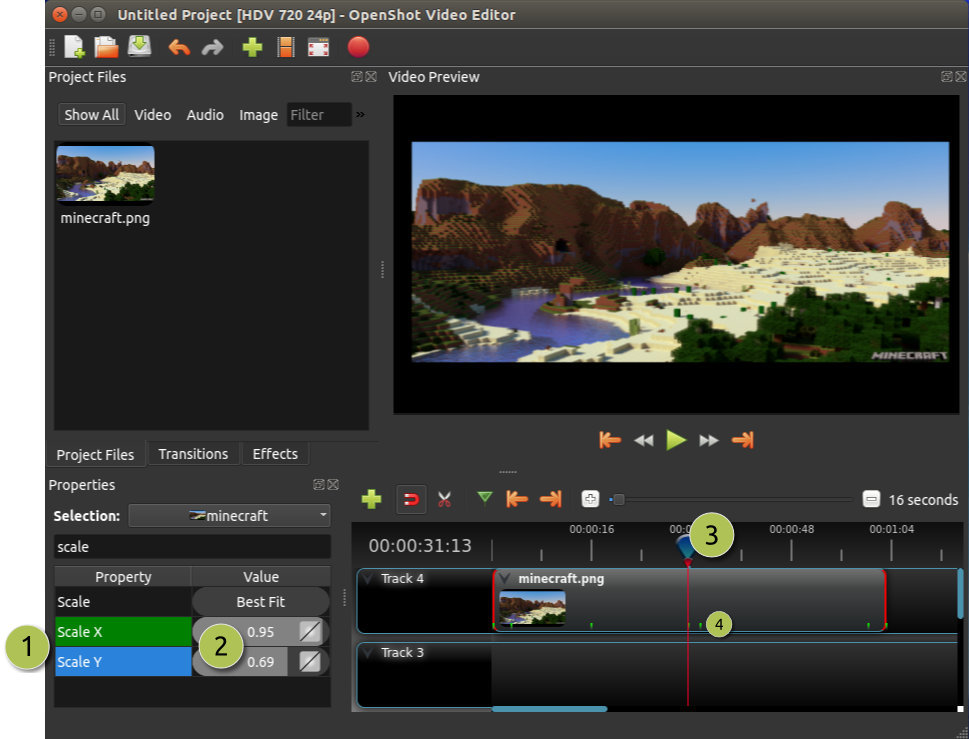
1 |
Green Property |
When the play-head is on a key frame, the property appears green |
1 |
Blue Property |
When the play-head is on an interpolated value, the property appears blue |
2 |
Value Slider |
Click and drag your mouse to adjust the value (this automatically creates a key frame if needed) |
3 |
Play-head |
Position the play-head over a clip where you need a key frame |
4 |
Key frame Markers |
Small icons are displayed on the bottom of the clip for each active keyframe (circle=Bézier, diamond=linear, square=constant). These icons are filtered based on the property window. For example, if you filter only |
Key Frames
To create a key frame in OpenShot, simply position the play-head (i.e. playback position) at any point over a clip, and edit properties in the property dialog. If the property supports key frames, it will turn green, and a small icon (circle=Bézier, diamond=linear, square=constant) will appear on the bottom of your clip at that position. Move your play-head to another point over that clip, and adjust the properties again. All animations require at least 2 key frames, but can support an unlimited number of them.
To adjust the interpolation mode, right click on the small graph icon next to a property value.
Bézier Presets
When using a Bézier curve for animation, OpenShot includes more than 20 curve presets (which affect the shape of the curve). For example, Ease-In has a more gradual slope at the beginning, making an animation move slower at the beginning, and faster at the end. Ease-In/Out (Back) has a gradual beginning and ending, but actually goes past the expected value and then back (producing a bounce effect).
To choose a curve preset, right click on the small graph icon next to a key frame.
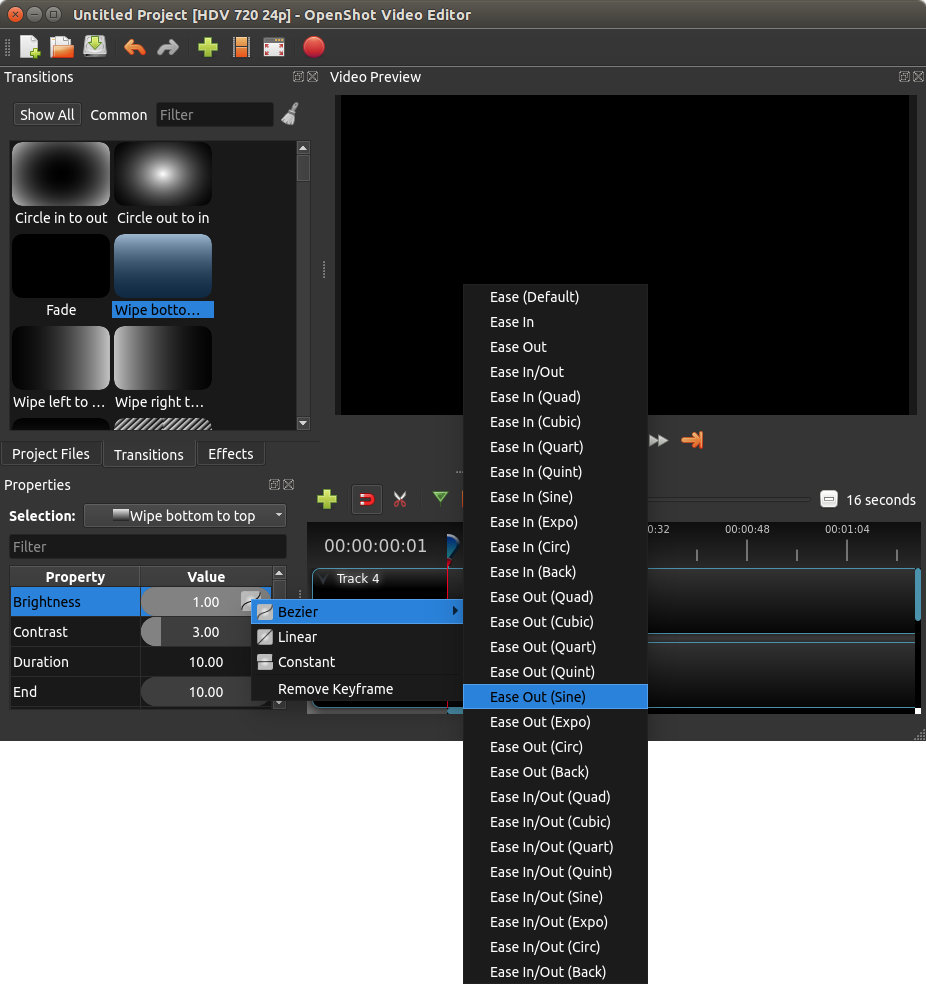
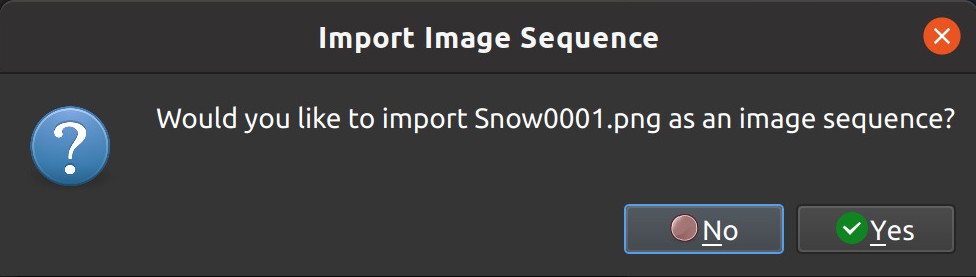
Image Sequences
If you have a sequence of similarly named images (such as, cat001.png, cat002.png, cat003.png, etc…), you can simply drag and drop one of them into OpenShot, and you will be prompted to import the entire sequence.
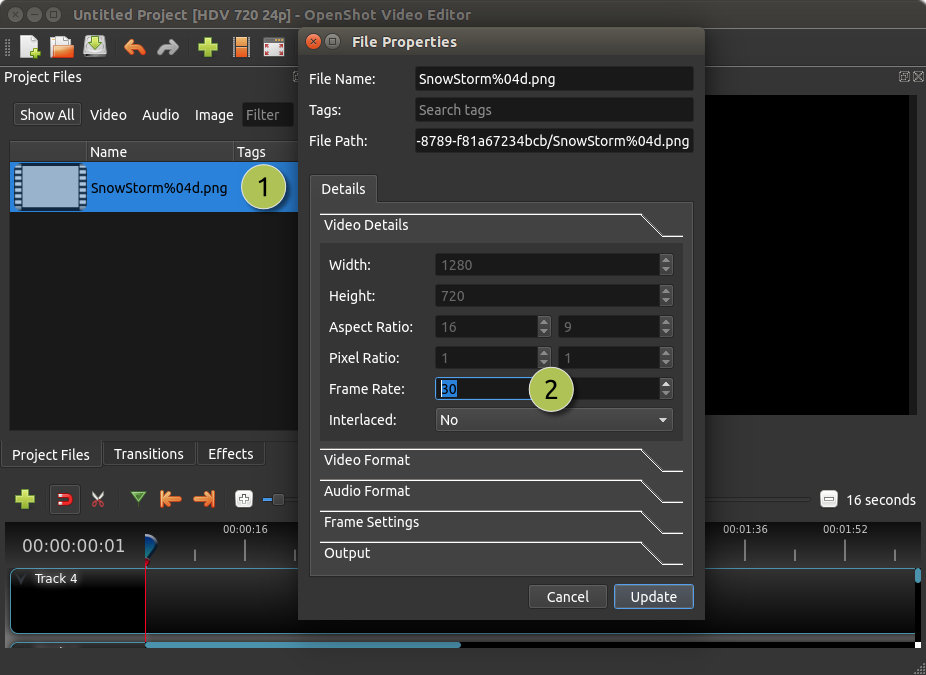
To adjust the frame rate of the animation, right click and choose File Properties in the Project Files panel, and adjust the frame rate. Once you have set the correct frame rate, drag the animation onto the timeline.