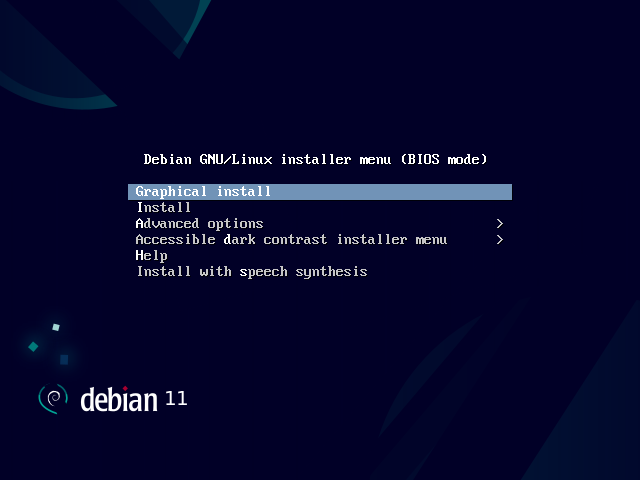
BIOS 啟動 CD-ROM 或 DVD-ROM 後,立即出現 Isolinux 啟動程 式選單。此時,尚未載入 Linux 核心;此選單讓您選擇載入的核心以及轉換至此程序所需的參數。
For a standard installation, you only need to choose “Install” or “Graphical install” (with the arrow keys), then press the Enter key to initiate the remainder of the installation process. If the DVD-ROM is a “Multi-arch” disk, and the machine has an Intel or AMD 64-bit processor, those menu options enable the installation of the 64-bit variant (amd64) and the installation of the 32-bit variant remains available in a dedicated sub-menu (“32-bit install options”). If you have a 32-bit processor, you don't get a choice and the menu entries install the 32-bit variant (i386).
每個選單條目隱藏一個特定的啟動指令列,在驗證和啟動前,可用TAB 鍵組態它。“說明” 選單款目顯示舊的命令列介面,可用 F1 至 F10 鍵顯示不同的說明畫面。祗在極為特殊的情況下才會用到此選單。
“專業” 模式 (從 “進階選項” 的選單進入) 詳列安裝過程的選項,以及設定依序自動安裝。小心應對,此繁瑣模式的多種組態極容易混淆。
The "rescue" mode, also accessible in the “Advanced options” menu, allows to recover a broken system or fix the bootloader. After presenting the first few screens of the installer, it will allow to enter a shell prompt in the file system you selected to perform any necessary actions, or allow to re-install the bootloader.
Once booted, the installation program guides you step by step throughout the process. This section presents each of these steps in detail. Here we follow the process of an installation from an amd64 DVD-ROM (more specifically, the RC3 version of the installer for Bullseye); netinst installations, as well as the final release of the installer, may look slightly different. We will also address installation in graphical mode, but the only difference from “classic” (text-mode) installation is in the visual appearance.
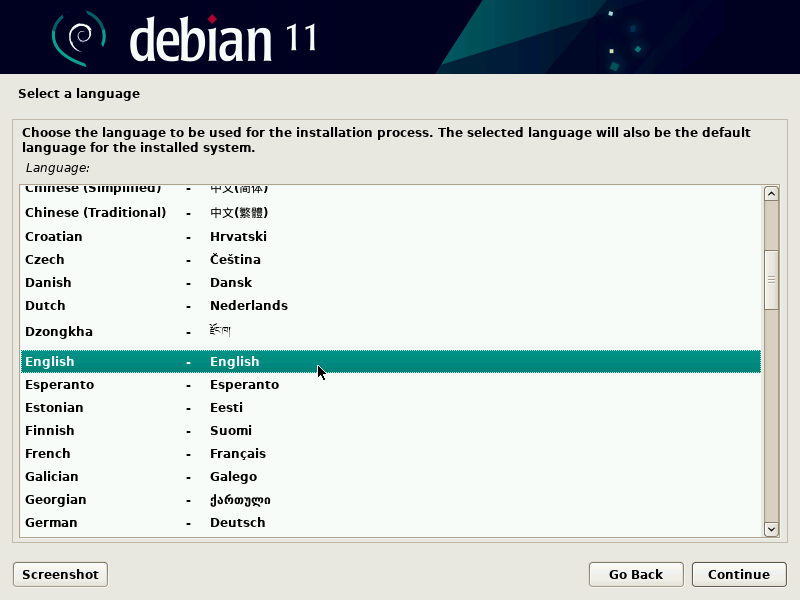
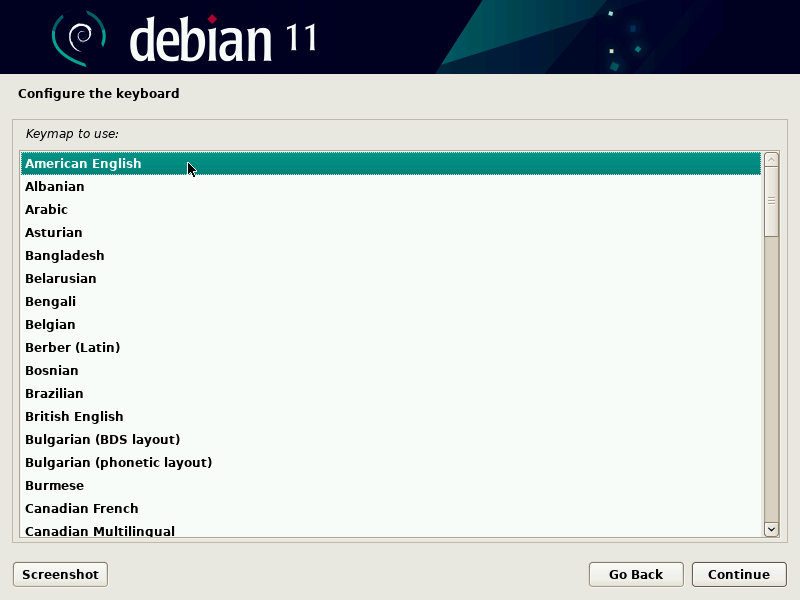
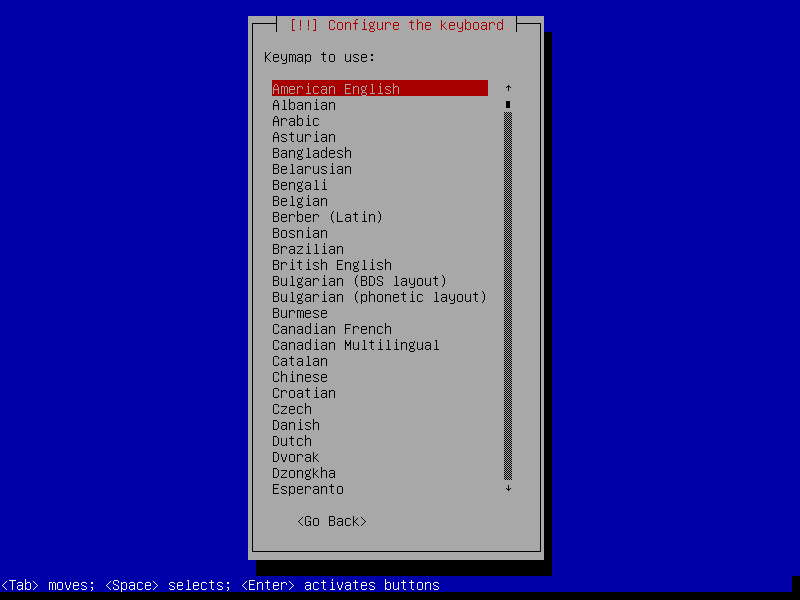
安裝程式以英語開始,但第一步就允許用戶選取使用的語系。比如選取中文(繁體),會提供完全中文的安裝介面 (同時把系統組態成中文(繁體))。這個選項也被用來定義在後續階段 (特別是鍵盤的佈局) 相關的預設選取。
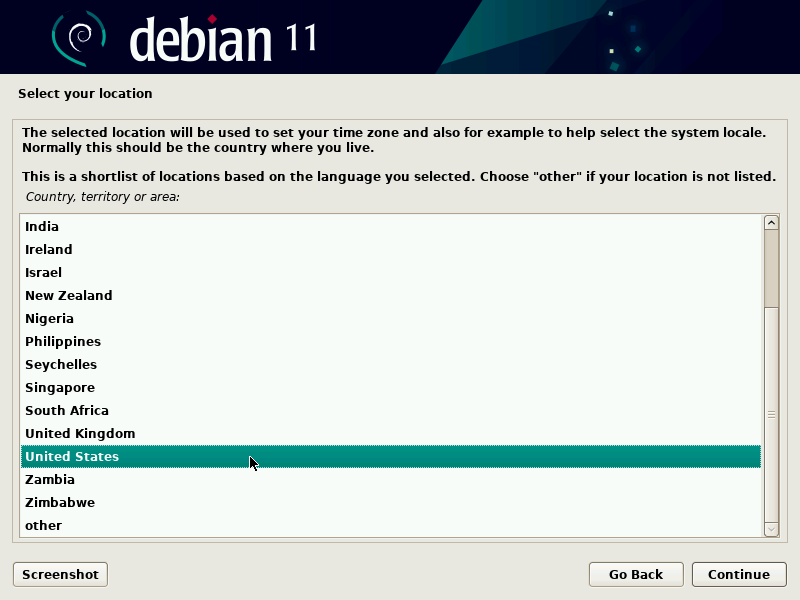
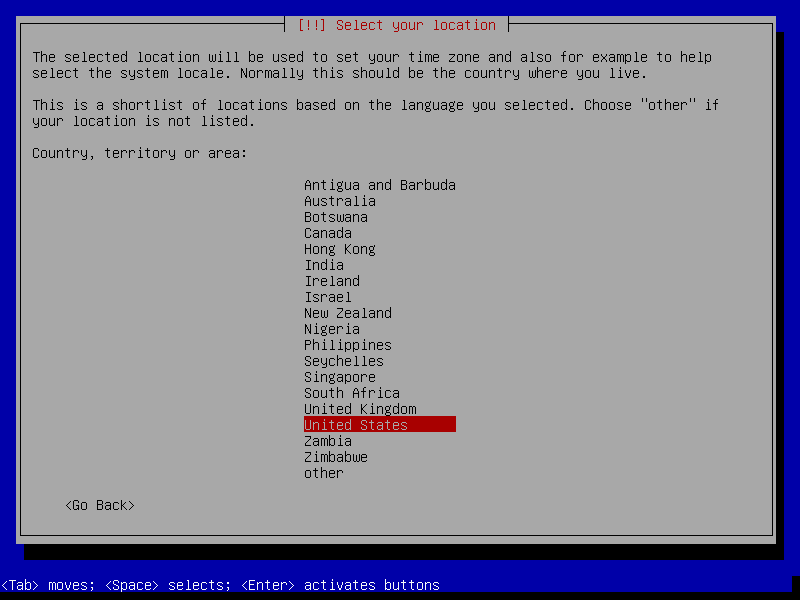
第二步是選擇國家。和語系關連,根據此資訊啟用最適合的鍵盤。也影響時區的組態。在美國,建議使用標準的 QWERTY 鍵盤,以及恰當的時區。
建議的 “美國標準” 鍵盤對應於常見的 QWERTY 布局。
竹竹安裝程式偵測硬體,並嚐試辨識使用的 CD-ROM 磁碟機,以備讀取其內容。下載對應的硬體套件的驅動模組,“掛載” CD-ROM 以便讀取其內容。前幾項步驟包括在 CD 的啟動映像裡,BIOS 從 CD 啟動的時候加載進了記憶體的一個受限大小的檔案。
The installer can work with the vast majority of drives, especially standard ATAPI peripherals (sometimes called IDE and EIDE). However, if detection of the CD-ROM reader fails, the installer offers the choice to load a kernel module (for instance, from a USB key) corresponding to the CD-ROM driver.
有了 CD 後,安裝器載入所有必要的檔案以備使用。包括其他硬體所需的驅動程式 (尤其是網 卡),以及其他。
This automatic step tries to identify the network card and load the corresponding module. If automatic detection fails, you can manually select the module to load. If no module works, it is possible to load a specific module from a removable device. This last solution is usually only needed if the appropriate driver is not included in the standard Linux kernel, but available elsewhere, such as the manufacturer's website or in firmware archives/packages.
此步驟必須成功才能安裝 netinst,因為需從網路下載e Debian 套件。
為了儘量自動化,安裝器試圖以 DHCP (IPV4) 與 IPV6 網路發現自動組態網路。若不成功,還有其他選擇:正常的 DHCP 組態、宣告機器名稱以 DHCP 組態、或設定固定網路組態。
最後的選項需要一個 IP 位址、子網路遮罩、閘道用 IP 位址、機器名稱、與網域名稱。
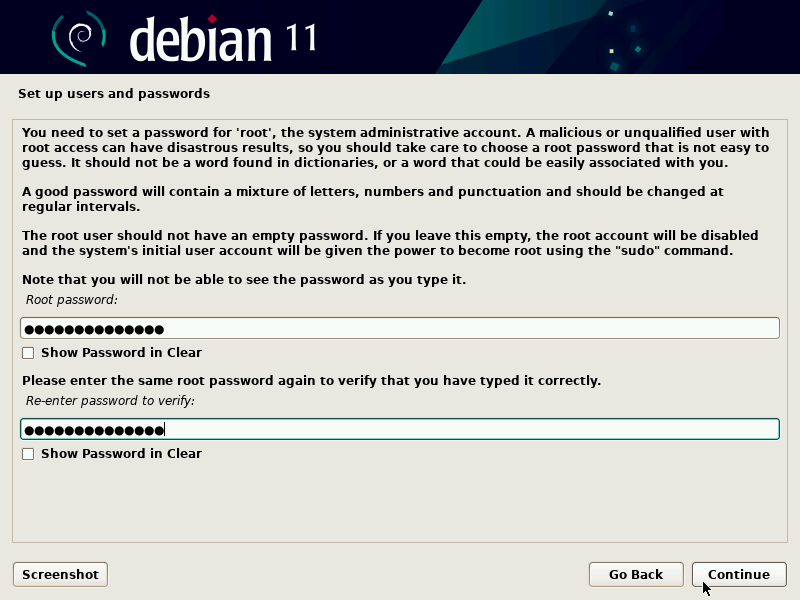
The super-user root account, reserved for the machine's administrator, is automatically created during installation; this is why a password is requested. The installer also asks for a confirmation of the password to prevent any input error, which would later be difficult to amend. Note that you can leave both fields empty if you want the root account to be disabled. In that case, the login for the root user will be deactivated and the first regular user — that will be created by the installer in the next step — will have administrative rights through
sudo (see
節 8.9.4, “共享管理員權限”).
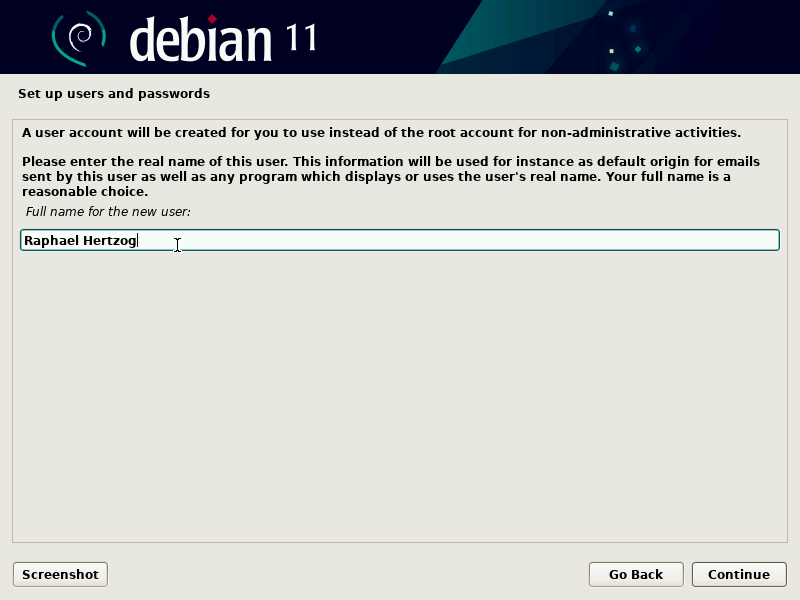
Debian 也規定了新增標準使用者帳號的原則,避免管理員以根使用者的權限工作。預防的原則是讓每個工作都在最低權限下運作,從而限制由人為錯誤造成的損害。這就是安裝器詢問新增第一個使用者的名稱、使用者名稱、及其密碼 (兩次,以避免錯誤)。
可以上網時,系統內部時鐘將從 NTP 伺服器更新 (以拍攝方式) 其時間。在第一次開機的時候更正記錄裡的時間印記。一段時間後,初始安裝後需設定 NTP daemon (見
節 8.9.2, “時間同步”)。
此步驟自動偵測安裝 Debian 的硬式磁碟機。下個步驟是:分區。
分割是新手的盲點。分割是把磁碟設定成多個區塊 (或 “分區”) 儲存 Linux 檔案系統與虛擬記憶體 (交換)。想要與已存在的其他作業系統併存更是複雜。本質上,需確定不改變區分表 (或不變更就不會造成損害)。
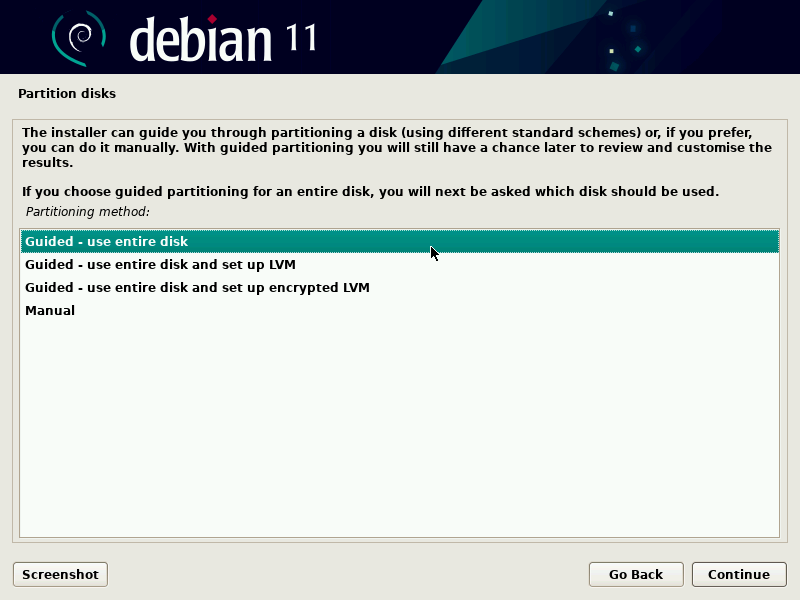
幸運地,分割軟體有個 “導引” 模式可用 — 大部份情況下,祗需驗證軟體的建議。
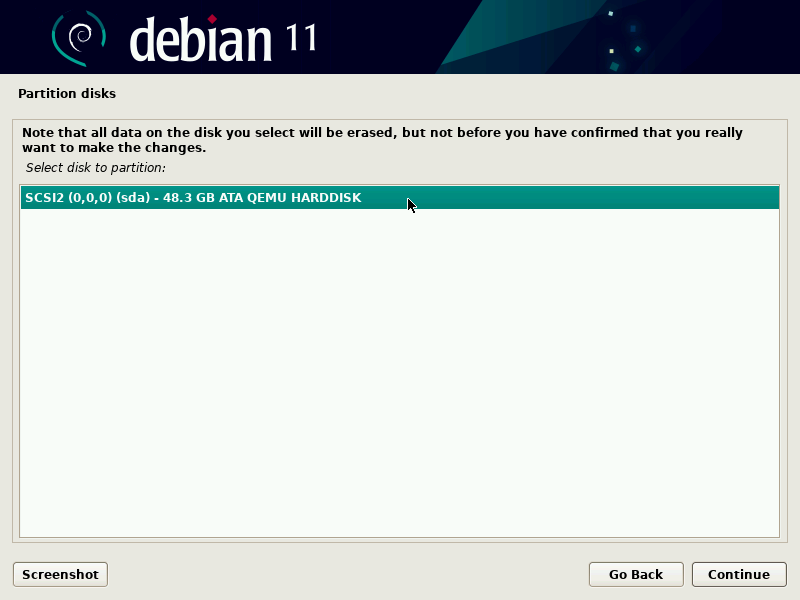
The first screen in the partitioning tool offers the choice of using an entire hard drive to create various partitions. For a (new) computer which will solely use Linux, this option is clearly the simplest, and you can choose the option “Guided - use entire disk”. If the computer has two hard drives for two operating systems, setting one drive for each is also a solution that can facilitate partitioning. In both of these cases, the next screen offers to choose the disk where Linux will be installed by selecting the corresponding entry (for example, “SCSI1 (0,0,0) (sda) - 53.7 GB ATA QEMU HARDDISK”). You then start guided partitioning.
引導分區也可設定 LVM 邏輯捲軸管理而不是分區 (見下方)。其他的操作都相同,就不再一一說明選項 “引導 - 使用整顆磁碟並設定 LVM” (編碼或無)。
在其他情況下,當 Linux 必須與其他作業系統併存時,必須選擇人工分割作業。
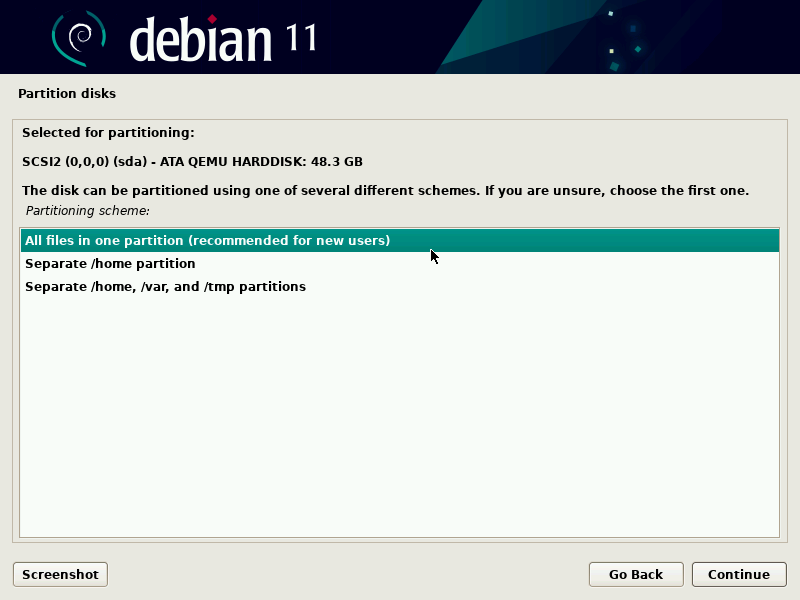
引導分割工具提供三種分割的方法,適用於不同的用途。
第一個方法為 “所有檔案在同一個分區”。把整個 Linux 系統樹儲在一個檔案系統,放在根 / 資料夾內。這個簡單強大的分割方式適用在個人或單一使用者系統。事實上,產生兩個分區:第一個儲存整個系統,第二個是虛擬記憶體 (交換)。
The second method, “Separate /home partition”, is similar, but splits the file hierarchy in two: one partition contains the Linux system (/), and the second contains “home directories” (meaning user data, in files and subdirectories available under /home/).
最後一個分割的方法,稱為 “獨立 /home、/var、與 /tmp 分區”,適用於伺服器與多使用者系統。把檔案分為多個分區:在根 (/) 與使用者帳號 (/home/) 分區外,還有分區供伺服器軟體資料 (/var/), and temporary files (/tmp/) 使用。這種做法的優點很多。使用者無法消耗所有的磁碟空間以鎖定伺服器 (祗能填滿 /tmp/ 與 /home/)。守護資料 (尤其是記錄) 不會阻塞系統的其他部份。
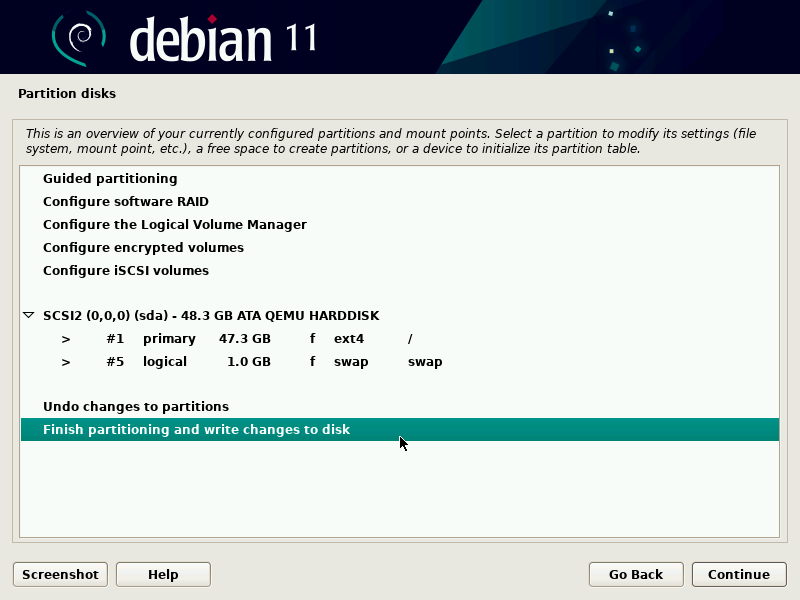
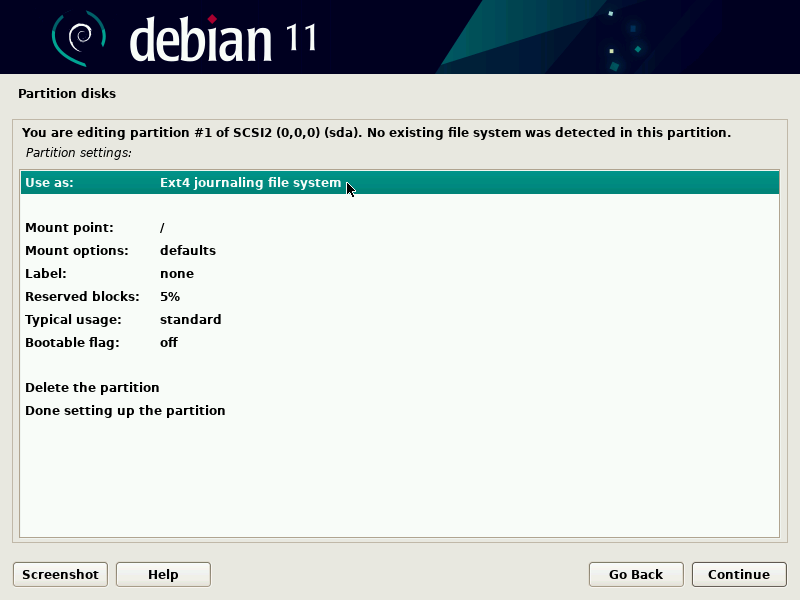
選定分區的方式後,軟體開始計算所需的空間,並顯示在螢幕上;使用者可以按著自己的需要調整它。如果不滿意預設的檔案系統 (ext4) 可以在這裡選擇其他的檔案系統。大部份情況下,建議的分區是合理的且可被接受,接著就按 “結束分割並寫入磁碟”。
手動分割的彈性更大,使用者自行決定各分區的功用及大小。而且,使用軟體 RAID 時更不可避免地採用此模式。
第一個畫面顯示可用的磁碟、其分區、與還未分割的可自由使用的空間。可自行選擇;按 Enter 鍵則出現可能的選項清單。
您可選擇清除所有分區。
選擇分區時,可以指定其為:
4.2.13.3. 組態多磁碟設備 (軟體式 RAID)
Some types of RAID allow the duplication of information stored on hard drives to prevent data loss in the event of a hardware problem affecting one of them. Level 1 RAID keeps a simple, identical copy (mirror) of a hard drive on another drive, while level 5 or 6 RAID splits redundant data over several disks, thus allowing the complete reconstruction of a failing drive.
僅在此描述最簡單的 RAID 1。第一步是在不同的磁碟建立兩個大小相同的分區,並指定為 “RAID 實體卷”。
必須在分區工具中選擇 “組態軟體式 RAID” 把兩個分區合為一個虛擬磁碟並在組態畫面選擇 “新增 MD 設備”。接著回答若干與此新設備有關的問題。第一個問題有關 RAID 的層次,現在選用 “RAID1”。第二個問題是使用的設備數量 — 本例是 2,需要被納入 MD 設備的分區數。第三個問題是備用設備數 — 0;目前沒有計畫加入其他磁碟取代可能出包的磁碟。最後一個問題是選擇 RAID 設備的分區 — 供此用途的是 2 (確認祗選擇標示為 “raid” 的分區)。
回到主選單,出現新增的虛擬 “RAID” 磁碟。此磁碟祗有一個不能刪除的分區,但可選擇其用途 (如同其他的分區)。
4.2.13.4. 組態邏輯捲軸管理器 (LVM)
LVM 允許您從新增合併多個磁碟的 “虛擬” 分區。其優點有二:分區的容量不受個別磁碟的限制,以及任何時間均可重組現有的分區,通常在運行一段時間後才有此需要。
LVM 使用特別的術語:虛擬分區是 “邏輯捲”,它是 “捲群組” 的一部份,或與多個 “實體捲” 相關。這些術語事實上對應於 “真實的” 分區 (或軟體 RAID 設備)。
此技術工作的方式很單純:每個實體或邏輯捲分為相同容量的塊,對應至 LVM。新增磁碟就是新增實體捲,新塊關連至任意的捲群組。可以擴充捲群組內的分區以得到更多空間。
分割工具以幾個步驟組態 LVM。首先在現有磁碟新增分區 “LVM 實體捲” 分區。選擇 “組態邏輯捲管理 (LVM)” 以啟動 LVM,就能關聯至現有的實體捲。最後,在此捲群組內新增邏輯捲。自動分割系統可以自動執行這些工作。
在分割選單內,每個實體捲顯示為一個不能刪除的分區磁碟,但可任意使用。
為了保障資料的保密,電腦或磁碟遺失或失竊時,必須對部份分區加密。此功能係對檔案系統加密,以 LVM 為例,Linux (及特定的 dm-crypt 驅動程式) 採用 Device Mapper 新增虛擬分區 (保護其內容),係在分區之下以加密形式儲存資料 (感謝 LUKS,即 Linux Unified Key Setup 的縮寫,它是一種標準格式,以加密方式儲存資料及加密演算法的元資訊標準格式)。
新增加密分區時,必須先指定可用的分區。就是指定一個分區,做為 “加密的實體捲”。分割有實體捲的磁碟後,選擇 “組態加密捲”。軟體將以隨機的資料起始實體捲 (讓旁人難以取得實際的資料),並要求鍵入 “加密句子”,做為每次開機進入加密分區的鑰匙。完成此步驟後,回到分割工具選單,出現標記為 “加密捲” 的新分區,就可以像其他分區一樣組態它。大部份情況下,此分區用於 LVM 實體捲以相同的鑰匙保護其他的分區 (LVM 邏輯捲),包括交換區 (見專欄
安全 加密交換分區)。
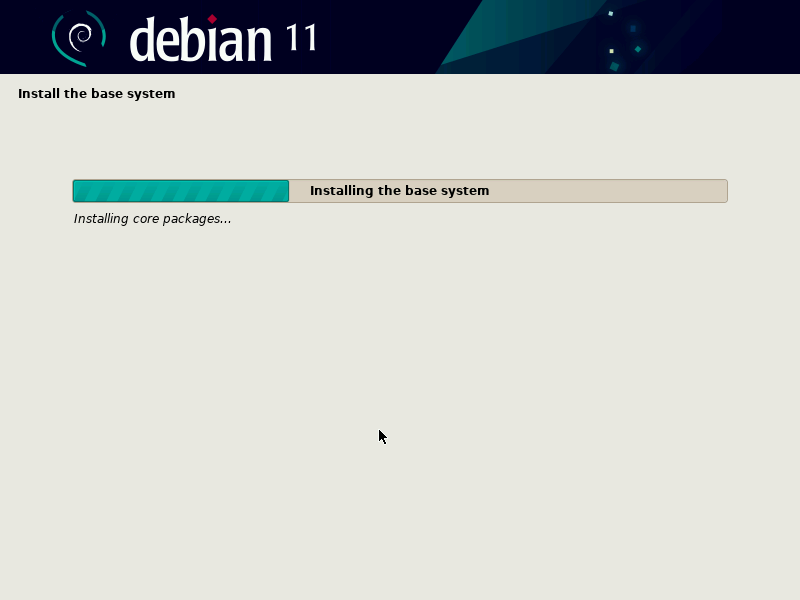
此步驟不需要使用者的參與,純粹安裝 Debian 的 “基本系統” 套件。包括 dpkg 與 apt 工具,用於管理 Debian 套件,以及啟動系統與起始所需的公用程式。
In order to be able to install additional software, APT needs to be configured and told where to find Debian packages. This step is as automated as possible.
If getting packages from the network is requested, the installer allows to choose a server from which to download these packages, by choosing first a country, then a mirror available in that country. A mirror is a public server hosting copies of all the files of the Debian master archive.
最後,提示使用 HTTP 代理伺服器 。若無,則直接近用網際網路。若鍵入 http://proxy.falcot.com:3128,則 APT 將使用 Falcot proxy/cache,就是 “Squid” 程式。經由相同網路的另部機器檢查其瀏覽器的組態即可找到這些設定。
The files Packages.xz and Sources.xz are then automatically downloaded to update the list of packages recognized by APT.
Debian 系統有個稱為流行競賽 popularity-contest 的套件,其目的是計算套件的使用程度。每週,此程式蒐集被安裝與使用的套件資訊,並以匿名方式將此資訊送給 Debian 計畫伺服器。以此資訊決定各套件的相對重要性,給予權重進而影響其優先度。特別的是,把最 “流行” 的套件納入安裝 CD-ROM,供給那些不想下載也不想購買整套 CD 的使用者。
此套件祗是隨選啟用,尊重使用者的隱私。
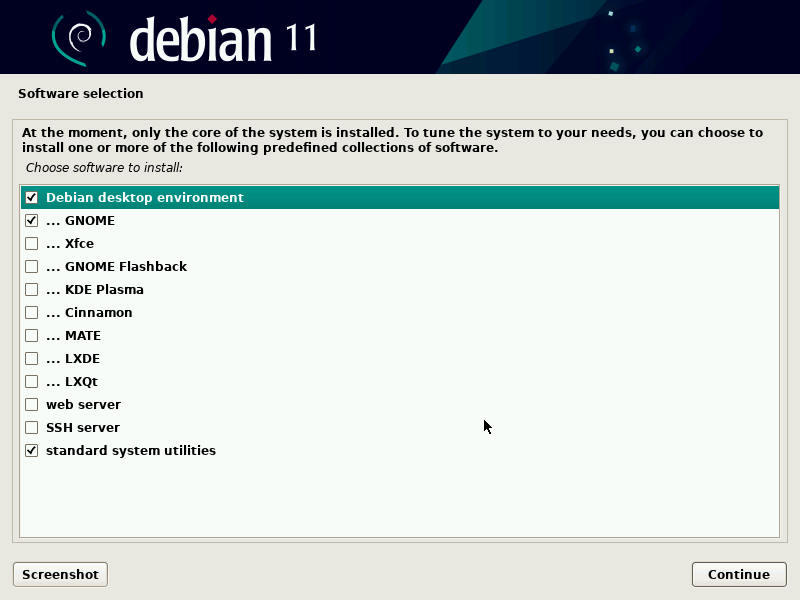
The following step allows you to choose the purpose of the machine in very broad terms; the twelve suggested tasks correspond to lists of packages to be installed. The list of the packages that will actually be installed will be fine-tuned and completed later on, but this provides a good starting point in a simple manner.
This step can require a full set of installation media or an internet connection and a working mirror setup as described above.
Some packages are also automatically installed according to the hardware detected (thanks to the program discover-pkginstall from the discover package).
啟動程式是 BIOS 啟用的第一個程式。載入 Linux 核心於記憶體並執行它。通常以選單方式允許使用者選擇載入的核心與啟動的作業系統。
GRUB 預設的選單,包括所有安裝的 Linux 核心,以及偵測到的其他作業系統。所以應該接受主安裝記錄的內容。若較新的核心故障或無法適用應體時,保留的舊核心就能派上用場,所以應保留舊版本的核心。
GRUB is the default bootloader installed by Debian thanks to its technical superiority: it works with most filesystems and therefore doesn't require an update after each installation of a new kernel, since it reads its configuration during boot and finds the exact position of the new kernel. Version 1 of GRUB (now known as “Grub Legacy”) couldn't handle all combinations of LVM and software RAID; version 2, installed by default, is more complete. While there may still be situations where it is preferable to install LILO (another bootloader); the Debian installer does no longer support the installation of it.
It is worth noting that GRUB is not a single bootloader, it is more like a collection of bootloaders suited for different cases. The numerous binary packages built out of the GRUB source package reflect that: grub-efi-amd64 is for 64-bit PC booting in UEFI mode, grub-efi-ia32 is for 32-bit PC booting in UEFI mode, grub-pc is for PC booting in BIOS mode, grub-uboot for ARM computers, etc.