Product SiteDocumentation Site

12.2. Virtualizzazione

La virtualizzazione è uno dei più grandi progressi dell'informatica negli ultimi anni. Il termine copre diverse astrazioni e tecniche per simulare macchine virtuali con grado variabile di indipendenza dall'effettivo hardware. Un server fisico può quindi ospitare diversi sistemi contemporaneamente in funzione e isolati fra loro. Le applicazioni sono molte e spesso derivano da questo isolamento; per esempio ambienti di prova con configurazioni variabili, oppure separazioni di servizi ospitati per ragioni di sicurezza su differenti macchine virtuali.
Ci sono numerose soluzioni di virtualizzazione, ciascuna coi suoi pro e contro. Questo libro si concentrerà su Xen, LXC e KVM, ma fra le altre implementazioni degne di nota vi sono le seguenti:

12.2.1. Xen

Xen è una situazione di «paravirtualizzazione». Introduce un sottile strato di astrazione, chiamato «ipervisore», fra l'hardware e i sistemi superiori; ciò agisce come un arbitro che controlla l'accesso all'hardware dalle macchine virtuali. Tuttavia, questo gestisce solo alcune delle istruzioni, mentre il resto è eseguito direttamente dall'hardware per conto dei sistemi. Il vantaggio principale è che non c'è degrado di prestazioni e i sistemi girano a una velocità prossima a quella nativa; il difetto è che i kernel dei sistemi operativi che si vogliono usare su un ipervisore Xen devono essere adattati per girare su Xen.
Let's spend some time on terms. The hypervisor is the lowest layer, which runs directly on the hardware, even below the kernel. This hypervisor can split the rest of the software across several domains, which can be seen as so many virtual machines. One of these domains (the first one that gets started) is known as dom0, and has a special role, since only this domain can control the hypervisor and the execution of other domains. These other domains are known as domU. In other words, and from a user point of view, the dom0 matches the “host” of other virtualization systems, while a domU can be seen as a “guest”.
L'uso di Xen sotto Debian richiede tre componenti:
  • The hypervisor itself. According to the available hardware, the appropriate package providing xen-hypervisor will be either xen-hypervisor-4.14-amd64, xen-hypervisor-4.14-armhf, or xen-hypervisor-4.14-arm64.
  • A kernel that runs on that hypervisor. Any kernel more recent than 3.0 will do, including the 5.10 version present in Bullseye.
  • L'architettura i386 richiede inoltre una libreria standard con le patch appropriate che si appoggino a Xen; questa si trova nel pacchetto libc6-xen.
The hypervisor also brings xen-utils-4.14, which contains tools to control the hypervisor from the dom0. This in turn brings the appropriate standard library. During the installation of all that, configuration scripts also create a new entry in the GRUB bootloader menu, so as to start the chosen kernel in a Xen dom0. Note, however, that this entry is not usually set to be the first one in the list, but it will be selected by default.
Una volta installati questi prerequisiti, il passo successivo è collaudare il comportamento del dom0 da solo; questo richiede un riavvio per entrare nell'ipervisore e nel kernel Xen. Il sistema dovrebbe avviarsi nel modo consueto, mostrando alcuni messaggi in più nella console durante i primi passi dell'inizializzazione.
Ora è il momento di installare veramente dei sistemi utili sui sistemi domU, usando gli strumenti di xen-tools. Questo pacchetto fornisce il comando xen-create-image, che automatizza gran parte del compito. L'unico parametro obbligatorio è --hostname, che dà un nome al domU; altre opzioni sono importanti, ma possono essere memorizzate nel file di configurazione /etc/xen-tools/xen-tools.conf e la loro mancanza dalla riga di comando non genera un errore. Perciò è importante controllare i contenuti di questo file prima di creare delle immagini oppure, in alternativa, usare parametri aggiuntivi nell'esecuzione di xen-create-image. I parametri importanti includono:
  • --memory, per specificare la quantità di RAM dedicata al sistema appena creato;
  • --size e --swap, per definire la dimensione dei «dischi virtuali» disponibili al domU;
  • --debootstrap-cmd, to specify the which debootstrap command is used. The default is debootstrap if debootstrap and cdebootstrap are installed. In that case, the --dist option will also most often be used (with a distribution name such as bullseye).
  • --dhcp dichiara che la configurazione di rete del domU deve essere ottenuta tramite DHCP mentre --ip permette di definire un indirizzo IP statico.
  • Da ultimo, bisogna scegliere un metodo di memorizzazione per le immagini da creare (quelle che saranno viste come dischi fissi dal domU). Il metodo più semplice, che corrisponde all'opzione --dir, è di creare un file sul dom0 per ogni dispositivo da rendere disponibile al domU. Per i sistemi che usano LVM, l'alternativa è usare l'opzione --lvm, seguita dal nome di un gruppo di volume; quindi xen-create-image creerà un nuovo volume logico dentro quel gruppo e questo volume logico sarà reso disponibile al domU come disco fisso.
Una volta effettuate queste scelte, si può creare l'immagine per il futuro domU Xen:
# xen-create-image --hostname testxen --dhcp --dir /srv/testxen --size=2G --dist=bullseye --role=udev

General Information
--------------------
Hostname       :  testxen
Distribution   :  bullseye
Mirror         :  http://deb.debian.org/debian
Partitions     :  swap            512M  (swap)
                  /               2G    (ext4)
Image type     :  sparse
Memory size    :  256M
Bootloader     :  pygrub

[...]
Logfile produced at:
	 /var/log/xen-tools/testxen.log

Installation Summary
---------------------
Hostname        :  testxen
Distribution    :  bullseye
MAC Address     :  00:16:3E:C2:07:EE
IP Address(es)  :  dynamic
SSH Fingerprint :  SHA256:K+0QjpGzZOacLZ3jX4gBwp0mCESt5ceN5HCJZSKWS1A (DSA)
SSH Fingerprint :  SHA256:9PnovvGRuTw6dUcEVzzPKTITO0+3Ki1Gs7wu4ke+4co (ECDSA)
SSH Fingerprint :  SHA256:X5z84raKBajUkWBQA6MVuanV1OcV2YIeD0NoCLLo90k (ED25519)
SSH Fingerprint :  SHA256:VXu6l4tsrCoRsXOqAwvgt57sMRj2qArEbOzHeydvV34 (RSA)
Root Password   :  FS7CUxsY3xkusv7EkbT9yae
Adesso è stata creata una macchina virtuale, ma attualmente non è in esecuzione (e quindi occupa solo spazio sul disco fisso del dom0). Ovviamente si possono creare altre immagini, magari con parametri diversi.
Before turning these virtual machines on, we need to define how they'll be accessed. They can of course be considered as isolated machines, only accessed through their system console, but this rarely matches the usage pattern. Most of the time, a domU will be considered as a remote server, and accessed only through a network. However, it would be quite inconvenient to add a network card for each domU; which is why Xen allows creating virtual interfaces that each domain can see and use in a standard way. Note that these cards, even though they're virtual, will only be useful once connected to a network, even a virtual one. Xen has several network models for that:
  • Il modello più semplice è il modello bridge; tutte le schede di rete eth0 (sia nel dom0 che nei sistemi domU) si comportano come se fossero direttamente inserite in uno switch Ethernet.
  • C'è poi il modello routing, dove il dom0 si comporta come un router che sta fra i sistemi domU e la rete esterna (fisica).
  • Infine, nel modello NAT, il dom0 è di nuovo fra i sistemi domU e il resto della rete, ma i sistemi domU non sono direttamente accessibili dall'esterno e il traffico passa attraverso alcune traduzioni degli indirizzi di rete sul dom0.
Queste tre modalità di rete comprendono alcune interfacce dai nomi insoliti, come vif*, veth*, peth* e xenbr0. L'ipervisore Xen le dispone in qualunque configurazione sia stata definita, sotto il controllo degli strumenti nello spazio utente. Poiché le modalità NAT e routing si adattano solo a casi particolari, qui si descriverà solo il modello di bridge.
The standard configuration of the Xen packages does not change the system-wide network configuration. However, the xend daemon is configured to integrate virtual network interfaces into any pre-existing network bridge (with xenbr0 taking precedence if several such bridges exist). We must therefore set up a bridge in /etc/network/interfaces (which requires installing the bridge-utils package, which is why the xen-utils package recommends it) to replace the existing eth0 entry (be careful to use the correct network device name):
auto xenbr0
iface xenbr0 inet dhcp
    bridge_ports eth0
    bridge_maxwait 0
After rebooting to make sure the bridge is automatically created, we can now start the domU with the Xen control tools, in particular the xl command. This command allows different manipulations on the domains, including listing them and, starting/stopping them. You might need to increase the default memory by editing the variable memory from configuration file (in this case, /etc/xen/testxen.cfg). Here we have set it to 1024 (megabytes).
# xl list
Name                                        ID   Mem VCPUs	State	Time(s)
Domain-0                                     0  3918     2     r-----      35.1
# xl create /etc/xen/testxen.cfg
Parsing config from /etc/xen/testxen.cfg
# xl list
Name                                        ID   Mem VCPUs	State	Time(s)
Domain-0                                     0  2757     2     r-----      45.2
testxen                                      3  1024     1     r-----       1.3
Notare che il domU testxen usa memoria fisica presa dalla RAM che altrimenti sarebbe disponibile per il dom0, non memoria simulata. Pertanto bisogna fare attenzione, quando si assembla un server che deve ospitare istanze di Xen, a fornire RAM fisica secondo le necessità.
Voilà! La macchina virtuale è partita. Vi si può accedere in uno dei due modi. Il modo consueto è di connettersi ad essa "in remoto" tramite la rete, come ci si connetterebbe a una macchina reale; questo di solito richiederà di impostare un server DHCP o qualche configurazione di DNS. L'altro modo, che potrebbe essere l'unico se la configurazione di rete era errata, è di usare la console hvc0, con il comando xl console:
# xl console testxen
[...]

Debian GNU/Linux 11 testxen hvc0

testxen login: 
A questo punto si può aprire una sessione, proprio come si farebbe davanti alla tastiera della macchina virtuale. Lo scollegamento da questa console si ottiene con la combinazione di tasti Control+].
Una volta che il domU è attivo, può essere usato come qualunque altro server (visto che dopo tutto è un sistema GNU/Linux). Tuttavia, il suo stato di macchina virtuale permette di sfruttare alcune funzionalità aggiuntive. Ad esempio, un domU può essere temporaneamente messo in pausa e poi fatto uscire dalla pausa con i comandi xl pause e xl unpause. Notare che, sebbene un domU in pausa non usi affatto il processore, la memoria ad esso allocata è ancora in uso. Può essere interessante considerare i comandi xl save e xl restore: salvare un domU libera le risorse precedentemente usate da questo domU, compresa la RAM. Al ripristino (o all'uscita dalla pausa, se è per quello) un domU non si accorge di alcunché al di là del passare del tempo. Se un domU era in esecuzione quando il dom0 viene spento, gli script nel pacchetto salvano automaticamente il domU e lo ripristinano all'avvio successivo. Questo ovviamente comporterà i consueti inconvenienti che si riscontrano quando si iberna un computer portatile, per esempio; in particolare, se il domU viene sospeso per troppo tempo, le connessioni di rete possono scadere. Notare inoltre che a tutt'oggi Xen è incompatibile con gran parte della gestione energetica ACPI, il che impedisce di sospendere il sistema host (dom0).
Si può arrestare o riavviare un domU da dentro il domU (con il comando shutdown) o dal dom0, con xm shutdown o xl reboot.
La maggior parte dei sottocomandi di xl richiedono uno o più argomenti, spesso il nome di un domU. Questi argomenti sono ben descritti nella magina di manuale xl(1).

12.2.2. LXC

Anche se è usato per costruire "macchine virtuali", LXC non è, propriamente, un sistema di virtualizzazione, ma un sistema per isolare gruppi di processi l'uno dall'altro pur girando tutti sullo stesso host. Sfrutta alcune evoluzioni recenti nel kernel Linux, comunemente note come gruppi di controllo, con cui diversi insiemi di processi chiamati "gruppi" hanno visioni diverse di certi aspetti del sistema globale. Fra questi aspetti, i più importanti sono gli identificatori dei processi, la configurazione di rete e i punti di mount. Tale gruppo di processi isolati non avrà accesso agli altri processi nel sistema, ed i suoi accessi al file system possono essere ristretti a uno specifico sottoinsieme. Può anche avere la propria interfaccia di rete e la propria tabella di routing e può essere configurato per vedere solo un sottoinsieme dei dispositivi disponibili presenti sul sistema.
These features can be combined to isolate a whole process family starting from the init process, and the resulting set looks very much like a virtual machine. The official name for such a setup is a “container” (hence the LXC moniker: LinuX Containers), but a rather important difference with “real” virtual machines such as provided by Xen or KVM is that there is no second kernel; the container uses the very same kernel as the host system. This has both pros and cons: advantages include excellent performance due to the total lack of overhead, and the fact that the kernel has a global vision of all the processes running on the system, so the scheduling can be more efficient than it would be if two independent kernels were to schedule different task sets. Chief among the inconveniences is the impossibility to run a different kernel in a container (whether a different Linux version or a different operating system altogether).
Poiché si parla di isolamento e non di virtualizzazione vera e propria, impostare i contenitori LXC è più complesso che far girare debian-installer su una macchina virtuale. Verranno descritti alcuni prerequisiti, e poi si passerà alla configurazione di rete; a questo punto si potrà effettivamente creare il sistema da far girare nel contenitore.

12.2.2.1. Passi preliminari

Il pacchetto lxc contiene gli strumenti necessari per far girare LXC e quindi deve essere installato.
LXC richiede anche il sistema di configurazione dei gruppi di controllo, che è un filesystem virtuale da montare su /sys/fs/cgroup. Dal momento che Debian 8 è passata a systemd, che si basa anche su gruppi di controllo, questo ora è fatto automaticamente al boot senza ulteriori configurazioni.

12.2.2.2. Configurazione di rete

The goal of installing LXC is to set up virtual machines; while we could, of course, keep them isolated from the network, and only communicate with them via the filesystem, most use cases involve giving at least minimal network access to the containers. In the typical case, each container will get a virtual network interface, connected to the real network through a bridge. This virtual interface can be plugged either directly onto the host's physical network interface (in which case the container is directly on the network), or onto another virtual interface defined on the host (and the host can then filter or route traffic). In both cases, the bridge-utils package will be required.
The simple case is just a matter of editing /etc/network/interfaces, moving the configuration for the physical interface (for instance, eth0 or enp1s0) to a bridge interface (usually br0), and configuring the link between them. For instance, if the network interface configuration file initially contains entries such as the following:
auto eth0
iface eth0 inet dhcp
Devono essere disabilitate e sostituite con le seguenti:
auto br0
iface br0 inet dhcp
    bridge-ports eth0
L'effetto di questa configurazione sarà simile a ciò che si otterrebbe se i contenitori fossero macchine collegate alla stessa rete fisica dell'host. La configurazione «bridge» gestisce il transito dei frame Ethernet fra tutte le interfacce in bridge, il che include la eth0 fisica oltre alle interfacce definite per i contenitori.
In cases where this configuration cannot be used (for instance, if no public IP addresses can be assigned to the containers), a virtual tap interface will be created and connected to the bridge. The equivalent network topology then becomes that of a host with a second network card plugged into a separate switch, with the containers also plugged into that switch. The host must then act as a gateway for the containers if they are meant to communicate with the outside world.
Oltre a bridge-utils, questa configurazione «ricca» richiede il pacchetto vde2; il file /etc/network/interfaces allora diventa:
# Interface eth0 is unchanged
auto eth0
iface eth0 inet dhcp

# Virtual interface 
auto tap0
iface tap0 inet manual
    vde2-switch -t tap0

# Bridge for containers
auto br0
iface br0 inet static
    bridge-ports tap0
    address 10.0.0.1
    netmask 255.255.255.0
La rete allora può essere impostata staticamente nei contenitori o dinamicamente con un server DHCP che gira sull'host. Tale server DHCP dovrà essere configurato per rispondere alle richieste sull'interfaccia br0.

12.2.2.3. Impostazione del sistema

Let us now set up the filesystem to be used by the container. Since this “virtual machine” will not run directly on the hardware, some tweaks are required when compared to a standard filesystem, especially as far as the kernel, devices and consoles are concerned. Fortunately, the lxc package includes scripts that mostly automate this configuration. For instance, the following commands (which require the debootstrap and rsync packages) will install a Debian container:
# lxc-create -n testlxc -t debian
debootstrap is /usr/sbin/debootstrap
Checking cache download in /var/cache/lxc/debian/rootfs-stable-amd64 ... 
Downloading debian minimal ...
I: Retrieving Release 
I: Retrieving Release.gpg 
[...]
Download complete.
Copying rootfs to /var/lib/lxc/testlxc/rootfs...
[...]
# 
Notare che il file system è creato all'inizio in /var/cache/lxc e poi spostato nella sua directory di destinazione. Ciò permette di creare contenitori identici molto più rapidamente, visto che a questo punto basta copiarli.
Note that the Debian template creation script accepts an --arch option to specify the architecture of the system to be installed and a --release option if you want to install something else than the current stable release of Debian. You can also set the MIRROR environment variable to point to a local Debian mirror.
The lxc package further creates a bridge interface lxcbr0, which by default is used by all newly created containers via /etc/lxc/default.conf and the lxc-net service:
lxc.net.0.type = veth
lxc.net.0.link = lxcbr0
lxc.net.0.flags = up
These entries mean, respectively, that a virtual interface will be created in every new container; that it will automatically be brought up when said container is started; and that it will be automatically connected to the lxcbr0 bridge on the host. You will find these settings in the created container's configuration (/var/lib/lxc/testlxc/config), where also the device' MAC address will be specified in lxc.net.0.hwaddr. Should this last entry be missing or disabled, a random MAC address will be generated.
Un'altra voce di utile in quel file è l'impostazione del nome host:
lxc.uts.name = testlxc
The newly-created filesystem now contains a minimal Debian system and a network interface.

12.2.2.4. Avvio del contenitore

Now that our virtual machine image is ready, let's start the container with lxc-start --name=testlxc.
In LXC releases following 2.0.8, root passwords are not set by default. We can set one running lxc-attach -n testlxc passwd if we want. We can login with:
# lxc-console -n testlxc
Connected to tty 1
Type <Ctrl+a q> to exit the console, <Ctrl+a Ctrl+a> to enter Ctrl+a itself

Debian GNU/Linux 11 testlxc tty1

testlxc login: root
Password: 
Linux testlxc 5.10.0-11-amd64 #1 SMP Debian 5.10.92-1 (2022-01-18) x86_64

The programs included with the Debian GNU/Linux system are free software;
the exact distribution terms for each program are described in the
individual files in /usr/share/doc/*/copyright.

Debian GNU/Linux comes with ABSOLUTELY NO WARRANTY, to the extent
permitted by applicable law.
Last login: Wed Mar  9 01:45:21 UTC 2022 on console
root@testlxc:~# ps auxwf
USER         PID %CPU %MEM    VSZ   RSS TTY      STAT START   TIME COMMAND
root           1  0.0  0.2  18964 11464 ?        Ss   01:36   0:00 /sbin/init
root          45  0.0  0.2  31940 10396 ?        Ss   01:37   0:00 /lib/systemd/systemd-journald
root          71  0.0  0.1  99800  5724 ?        Ssl  01:37   0:00 /sbin/dhclient -4 -v -i -pf /run/dhclient.eth0.pid [..]
root          97  0.0  0.1  13276  6980 ?        Ss   01:37   0:00 sshd: /usr/sbin/sshd -D [listener] 0 of 10-100 startups
root         160  0.0  0.0   6276  3928 pts/0    Ss   01:46   0:00 /bin/login -p --
root         169  0.0  0.0   7100  3824 pts/0    S    01:51   0:00  \_ -bash
root         172  0.0  0.0   9672  3348 pts/0    R+   01:51   0:00      \_ ps auxwf
root         164  0.0  0.0   5416  2128 pts/1    Ss+  01:49   0:00 /sbin/agetty -o -p -- \u --noclear [...]
root@testlxc:~# 
Ora ci si trova nel contenitore; l'accesso ai processi è ristretto solo a quelli avviati dal contenitore stesso e l'accesso al filesystem è analogamente ristretto al sottoinsieme dedicato del filesystem completo (/var/lib/lxc/testlxc/rootfs). Si può uscire dalla console con Control+a q.
Note that we ran the container as a background process, thanks to lxc-start starting using the --daemon option by default. We can interrupt the container with a command such as lxc-stop --name=testlxc.
Il pacchetto lxc contiene uno script di inizializzazione che può avviare automaticamente uno o più contenitori quando si avvia l'host (si basa su lxc-autostart che avvia i contenitori che hanno l'opzione lxc.start.auto impostata a 1). Un controllo più dettagliato dell'ordine di avvio è possibile con lxc.start.order e lxc.group: per impostazione predefinita, lo script di inizializzazione avvia prima i contenitori che fanno parte del gruppo onboot e poi i contenitori che non fanno parte di alcun gruppo. In entrambi i casi, l'ordine all'interno di un gruppo è definito dall'opzione lxc.start.order.

12.2.3. Virtualizzazione con KVM

KVM, che sta per Kernel-based Virtual Machine (Macchina Virtuale basata su Kernel), è prima di tutto un modulo del kernel che fornisce la maggior parte dell'infrastruttura che può essere usata da un virtualizzatore, ma di per sé non è un virtualizzatore. Il controllo effettivo della virtualizzazione è gestito da un'applicazione basata su QEMU. Non c'è da preoccuparsi se questa sezione menziona comandi qemu-*: si parla comunque di KVM.
Contrariamente ad altri sistemi di virtualizzazione, KVM è stato incluso nel kernel Linux fin dall'inizio.I suoi sviluppatori hanno scelto di sfruttare le istruzioni dei processori dedicate alla virtualizzazione (Intel-VT e AMD-V), cosa che mantiene KVM leggero, elegante e parco di risorse. Il rovescio della medaglia, ovviamente, è che KVM non funziona su tutti i computer ma solo su quelli con procesori adatti. Per i computer x86-based, è possibile verificare di avere un tale processore cercando vmx” o “svm” tra i flag della CPU elencati in /proc/cpuinfo.
Con il supporto attivo al suo sviluppo da parte di Red Hat, KVM sembra destinato a diventare il punto di riferimento per la virtualizzazione in Linux.

12.2.3.1. Passi preliminari

Unlike such tools as VirtualBox, KVM itself doesn't include any user-interface for creating and managing virtual machines. The virtual qemu-kvm package only provides an executable able to start a virtual machine, as well as an initialization script that loads the appropriate kernel modules.
Fortunately, Red Hat also provides another set of tools to address that problem, by developing the libvirt library and the associated virtual machine manager tools. libvirt allows managing virtual machines in a uniform way, independently of the virtualization system involved behind the scenes (it currently supports QEMU, KVM, Xen, LXC, OpenVZ, VirtualBox, VMWare, and UML). virt-manager is a graphical interface that uses libvirt to create and manage virtual machines.
We first install the required packages, with apt-get install libvirt-clients libvirt-daemon-system qemu-kvm virtinst virt-manager virt-viewer. libvirt-daemon-system provides the libvirtd daemon, which allows (potentially remote) management of the virtual machines running of the host, and starts the required VMs when the host boots. libvirt-clients provides the virsh command-line tool, which allows controlling the libvirtd-managed machines.
Il pacchetto virtinst fornisce virt-install, che permette di creare macchine virtuali da riga di comando. Infine, virt-viewer permette di accedere alla console grafica di una VM.

12.2.3.2. Configurazione di rete

Proprio come in Xen e LXC, la configurazione di rete più frequente richiede un bridge che raggruppa le interfacce di rete delle macchine virtuali (vedere Sezione 12.2.2.2, «Configurazione di rete»).
In alternativa e nella configurazione predefinita fornita da KVM, alla macchina virtuale è assegnato un indirizzo privato (nell'intervallo 192.168.122.0/24) e viene impostato il NAT cosicché la VM possa accedere alla rete esterna.
Il resto di questa sezione assume che l'host abbia un'interfaccia fisica eth0 e un bridge br0 e che la prima sia connessa al secondo.

12.2.3.3. Installazione con virt-install

Creare una macchina virtuale è molto simile a installare un sistema normale, tranne che le caratteristiche della macchina virtuale sono descritte da una riga di comando che sembra infinita.
In pratica, questo vuol dire che si userà l'installer Debian, avviando la macchina virtuale su un lettore DVD-ROM virtuale che viene mappato su un'immagine DVD di Debian memorizzata sul sistema host. La VM esporterà la sua console grafica sul protocollo VNC (vedere Sezione 9.2.2, «Utilizzo di desktop remoti grafici» per i dettagli), il che consentirà di controllare il processo di installazione.
We first need to tell libvirtd where to store the disk images, unless the default location (/var/lib/libvirt/images/) is fine.
# mkdir /srv/kvm
# virsh pool-create-as srv-kvm dir --target /srv/kvm
Pool srv-kvm created

# 
Si avvia il processo di installazione per la macchina virtuale e si guardano più da vicino le opzioni più importanti di virt-install. Questo comando registra la macchina virtuale e i suoi parametri in libvirtd, quindi la avvia cosicché la sua installazione può procedere.
# virt-install --connect qemu:///system  1
               --virt-type kvm           2
               --name testkvm            3
               --memory 2048             4
               --disk /srv/kvm/testkvm.qcow,format=qcow2,size=10  5
               --cdrom /srv/isos/debian-11.2.0-amd64-netinst.iso  6
               --network bridge=virbr0   7
               --graphics vnc            8
               --os-type linux           9
               --os-variant debiantesting


Starting install...
Allocating 'testkvm.qcow'

1

L'opzione --connect specifica l'«ipervisore» da usare. La sua forma è quella di un URL contenente un sistema di virtualizzazione (xen://, qemu://, lxc://, openvz://, vbox:// e così via) e la macchina che deve ospitare la VM (questo può essere lasciato vuoto nel caso dell'host locale). Inoltre e nel caso di QEMU/KVM ciascun utente può gestire macchine virtuali che funzionano con permessi ristretti e il percorso nell'URL permette di differenziare le macchine «di sistema» (/system) dalle altre (/session).

2

Poiché KVM è gestito allo stesso modo di QEMU, --virt-type kvm permette di specificare l'uso di KVM anche se l'URL sembra quello di QEMU.

3

L'opzione --name definisce un nome (unico) per la macchina virtuale.

4

The --memory option allows specifying the amount of RAM (in MB) to allocate for the virtual machine.

5

The --disk specifies the location of the image file that is to represent our virtual machine's hard disk; that file is created, unless present, with a size (in GB) specified by the size parameter. The format parameter allows choosing among several ways of storing the image file. The default format (qcow2) allows starting with a small file that only grows when the virtual machine starts actually using space.

6

L'opzione --cdrom è usata per indicare dove trovare il disco ottico da usare per l'installazione. Il percorso può essere un percorso locale di un file ISO, un URL dove reperire il file o il device di un lettore CD-ROM fisico (es. /dev/cdrom).

7

--network specifica come la scheda di rete virtuale si integra nella configurazione di rete dell'host. Il comportamento predefinito (che in questo esempio è esplicitamente forzato) è di integrarla in un qualunque bridge di rete preesistente. Se non esiste un tale bridge, la macchina virtuale raggiungerà la rete fisica solo tramite NAT, quindi riceve un indirizzo in un intervallo di una sottorete privata (192.168.122.0/24).
The default network configuration, which contains the definition for a virbr0 bridge interface, can be edited using virsh net-edit default and started via virsh net-start default if not already done automatically during system start.

8

--graphics vnc states that the graphical console should be made available using VNC. The default behavior for the associated VNC server is to only listen on the local interface; if the VNC client is to be run on a different host, establishing the connection will require setting up an SSH tunnel (see Sezione 9.2.1.4, «Creazione di tunnel cifrati con il port forwarding»). Alternatively, --graphics vnc,listen=0.0.0.0 can be used so that the VNC server is accessible from all interfaces; note that if you do that, you really should design your firewall accordingly.

9

Le opzioni --os-type e --os-variant permettono di ottimizzare alcuni parametri della macchina virtuale, basandosi su alcune delle funzionalità note del sistema operativo lì menzionato.
The full list of OS types can be shown using the osinfo-query os command from the libosinfo-bin package.
A questo punto la macchina virtuale è in esecuzione e bisogna connettersi alla console grafica per procedere con il processo di installazione. Se la precedente operazione è stata lanciata da un ambiente desktop grafico, questa connessione dovrebbe essere avviata automaticamente. In caso contrario, o in caso si operi da remoto, si può eseguire 
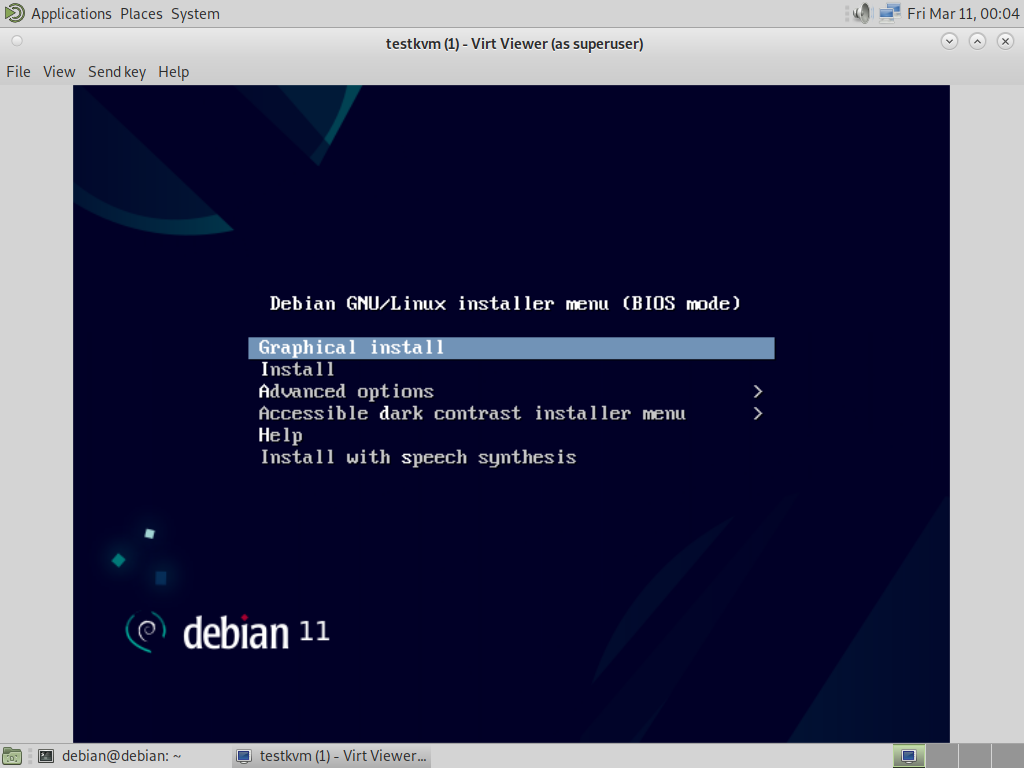
virt-viewer da qualunque ambiente grafico per aprire la console grafica (notare che la password di root dell'host remoto viene chiesta due volte perché l'operazione richiede 2 connessioni SSH):
$ virt-viewer --connect qemu+ssh://root@server/system testkvm
root@server's password: 
Connecting to installer session using virt-viewer

Figura 12.1. Connecting to installer session using virt-viewer

Al termine del processo di installazione, la macchina virtuale viene riavviata ed è ora pronta all'uso.

12.2.3.4. Gestire macchine con virsh

Ora che l'installazione è terminata, si passa a come gestire le macchine virtuali disponibili. La prima cosa da provare è chiedere a libvirtd la lista delle macchine virtuali che gestisce:
# virsh -c qemu:///system list --all
 Id Name                 State
----------------------------------
  8 testkvm              shut off
Si avvia la macchina virtuale di prova:
# virsh -c qemu:///system start testkvm
Domain testkvm started
Si possono ora ottenere le istruzioni per connettersi alla console grafica (il display VNC restituito può essere passato come parametro a vncviewer):
# virsh -c qemu:///system vncdisplay testkvm
127.0.0.1:0
Altri sottocomandi disponibili di virsh includono:
  • reboot per riavviare una macchina virtuale;
  • shutdown per provocare uno spegnimento pulito;
  • destroy per fermarla brutalmente;
  • suspend per metterla in pausa;
  • resume per farla uscire dalla pausa;
  • autostart per abilitare (o disabilitare, con l'opzione --disable) l'avvio automatico della macchina virtuale all'avvio dell'host;
  • undefine per rimuovere ogni traccia della macchina virtuale da libvirtd.
Tutti questi sottocomandi accettano un identificatore di macchina virtuale come parametro.